> ## Documentation Index
> Fetch the complete documentation index at: https://docs.masivo.ai/llms.txt
> Use this file to discover all available pages before exploring further.
# In-app templates
> Learn how to create and manage in-app message templates in Masivo
## What you'll learn
By the end of this guide, you'll know how to design in-app message templates, set delivery priority, and prepare them for audience schedules or journey actions.
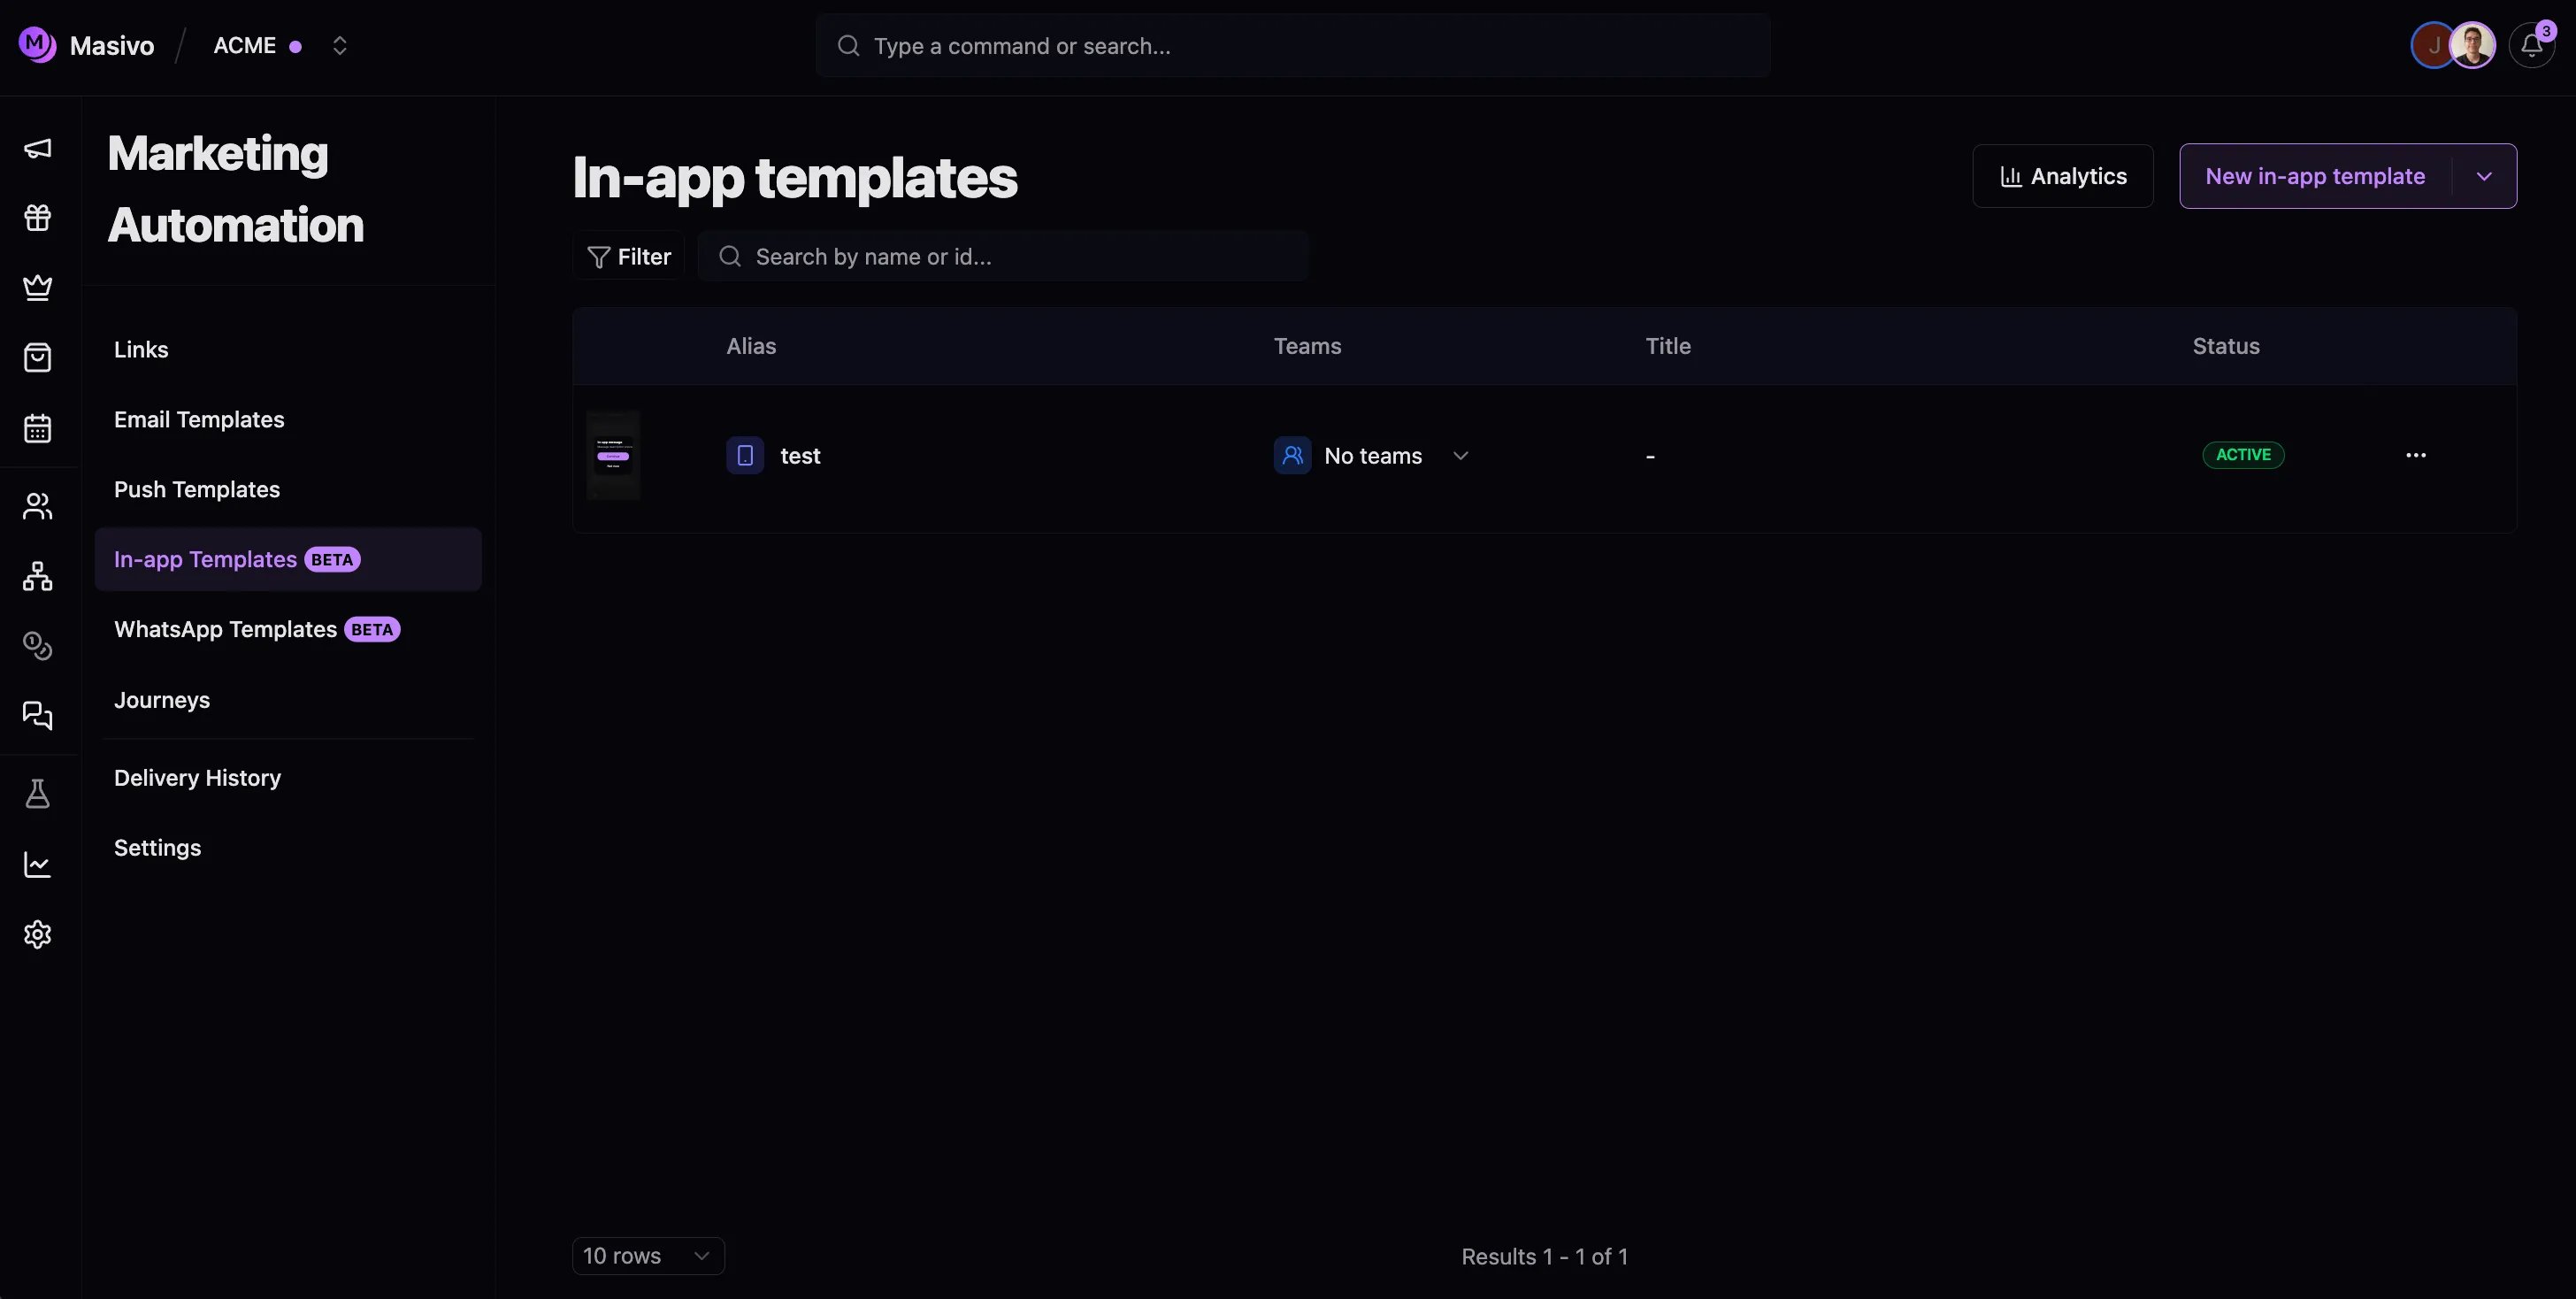
## Step 1: Access in-app templates
Navigate to **Marketing Automation → In-app templates** in the dashboard.
Click **New in-app template** to open the editor.
 ## Step 2: Choose a message type
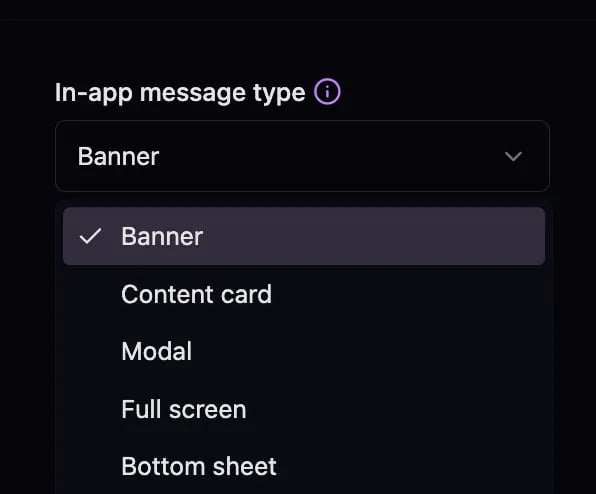
Select the surface that best fits your campaign:
* **Modal** — centered dialog for promotions or announcements
* **Fullscreen** — high-impact takeovers
* **Slide up** — bottom sheet for secondary actions
* **Banner** — lightweight top or bottom alerts
## Step 2: Choose a message type
Select the surface that best fits your campaign:
* **Modal** — centered dialog for promotions or announcements
* **Fullscreen** — high-impact takeovers
* **Slide up** — bottom sheet for secondary actions
* **Banner** — lightweight top or bottom alerts
 ## Step 3: Build the template content
Add a descriptive **name**, optional **description**, and **brand** when you
manage multiple brands.
Enter a **title** and **body**. Add an optional **image URL** for a hero
visual and configure **buttons** (primary action, dismiss, deeplink, or
external URL).
Under **Delivery**, set **priority** when multiple messages are eligible for
the same customer. Higher values win.
Use the team picker to restrict who sees this template in analytics. Leave
empty for account-wide visibility.
## Step 3: Build the template content
Add a descriptive **name**, optional **description**, and **brand** when you
manage multiple brands.
Enter a **title** and **body**. Add an optional **image URL** for a hero
visual and configure **buttons** (primary action, dismiss, deeplink, or
external URL).
Under **Delivery**, set **priority** when multiple messages are eligible for
the same customer. Higher values win.
Use the team picker to restrict who sees this template in analytics. Leave
empty for account-wide visibility.
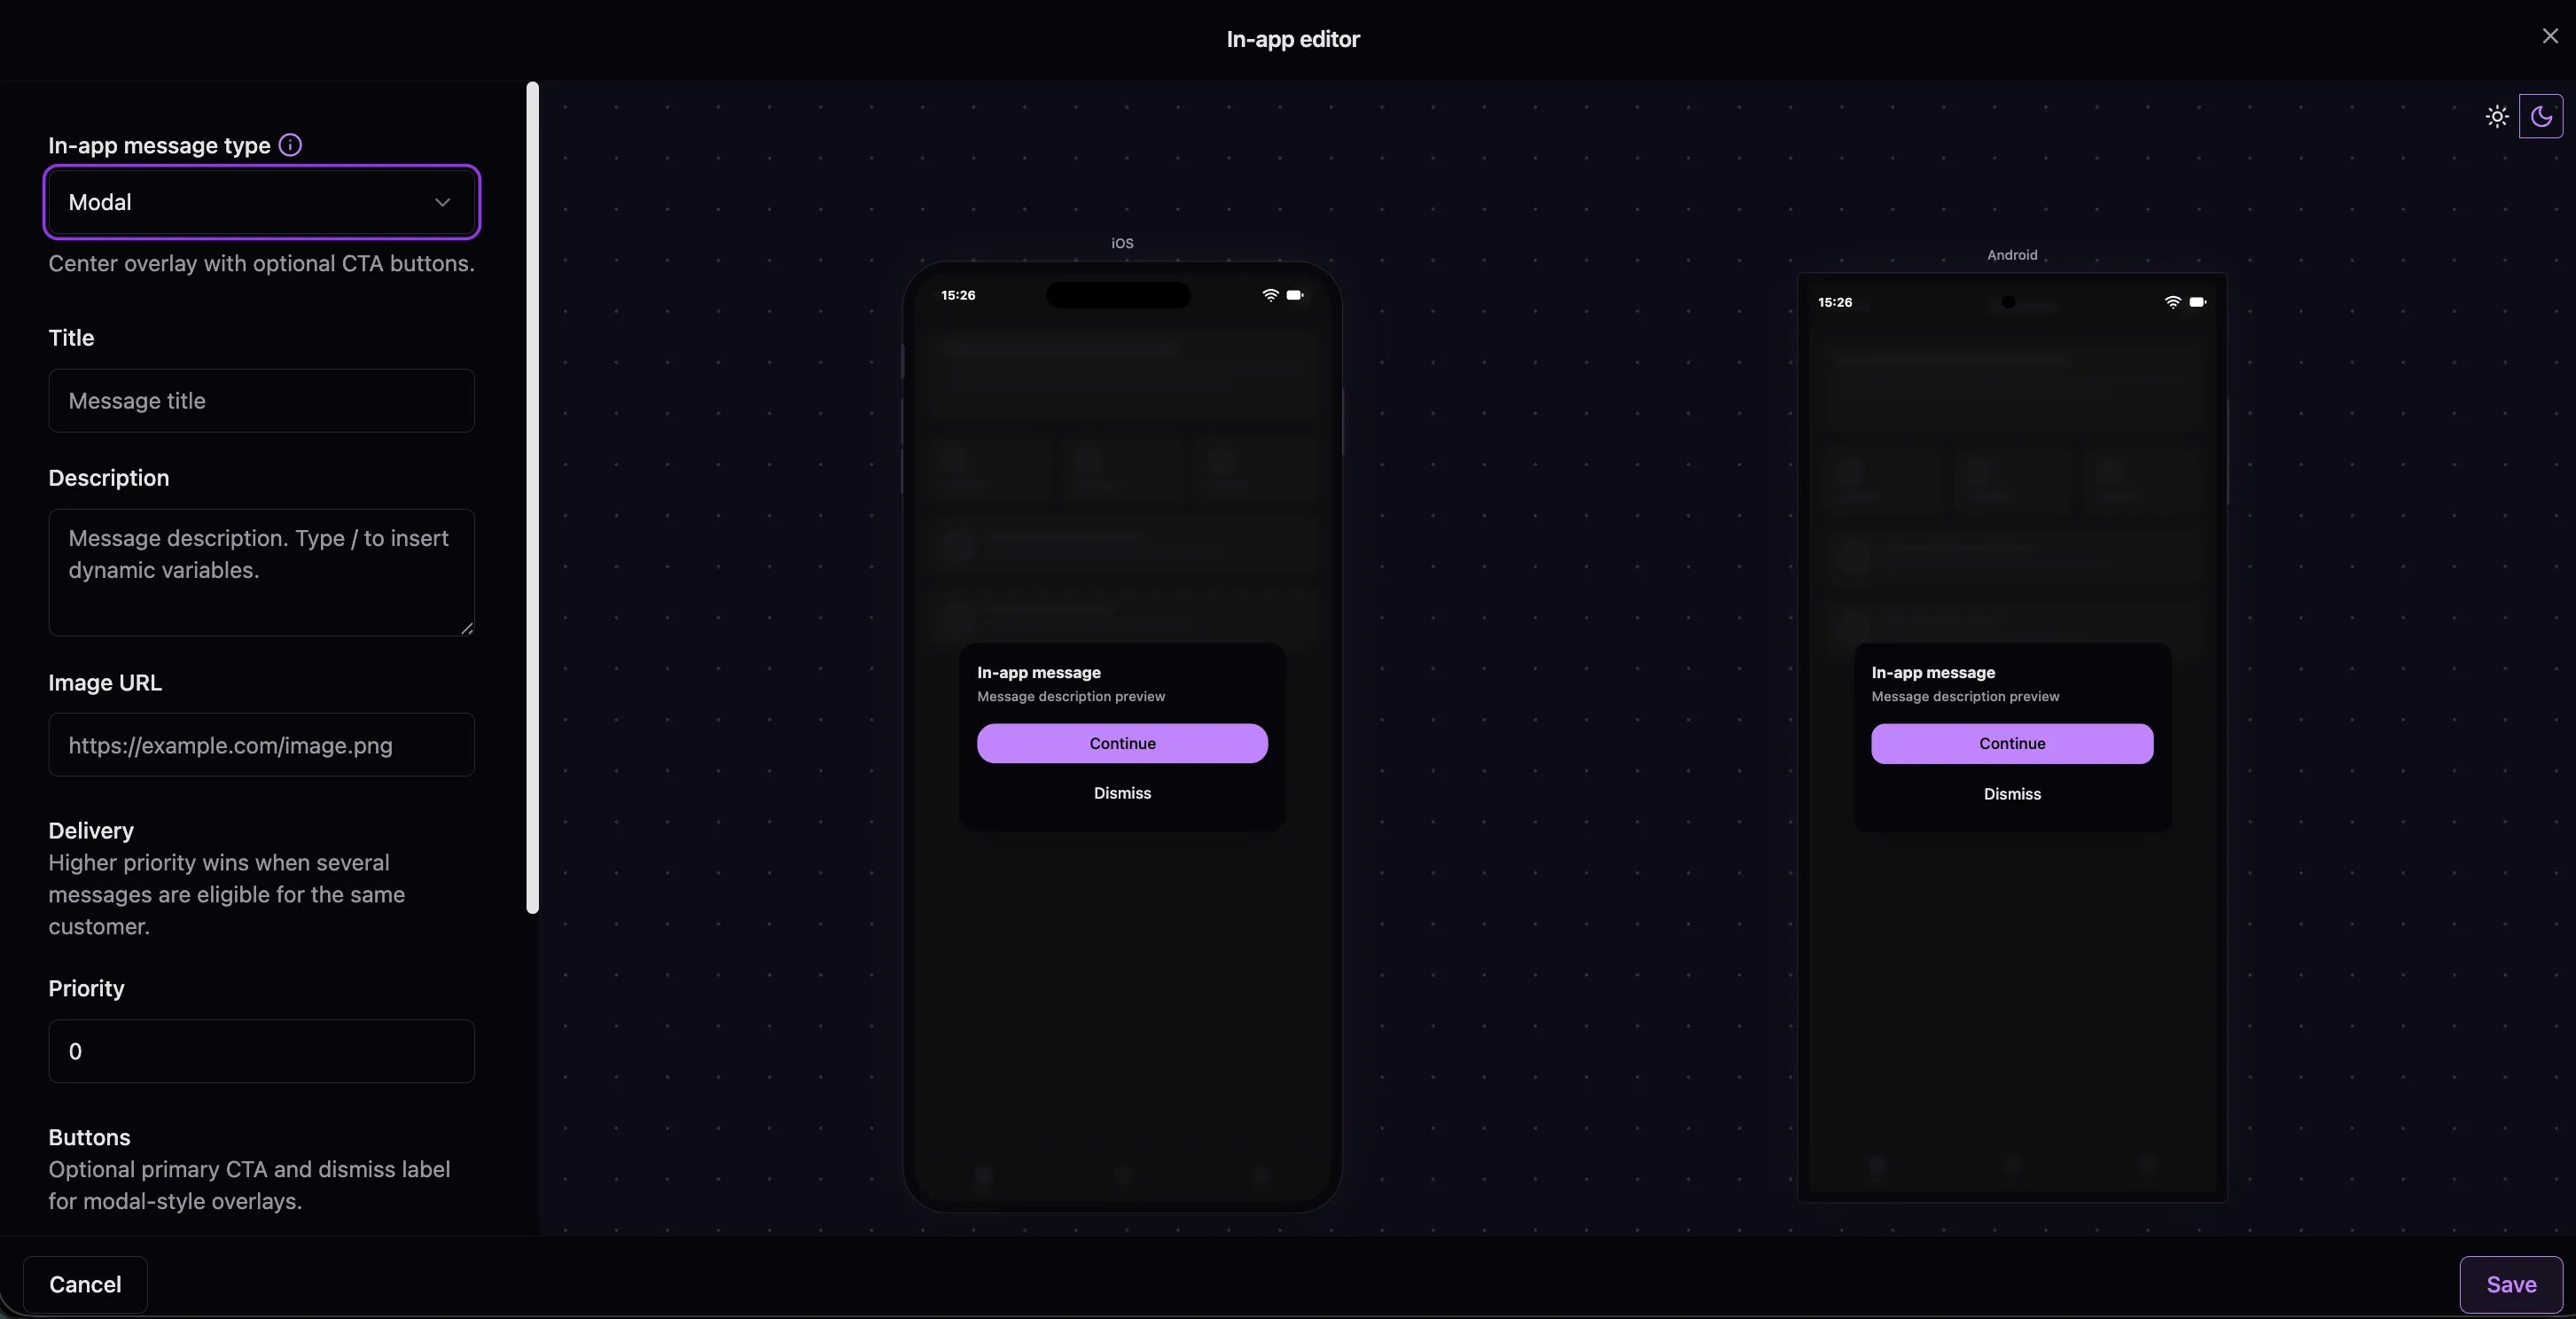 Use the iOS and Android previews to validate layout before saving.
## Step 4: Test and schedule
**Send test** delivers the template to a test audience so you can verify rendering on real devices.
**Schedule** materializes messages for a selected audience at a chosen time. Large audiences are subject to the in-app send limit shown in the scheduler.
## Step 5: Use in journeys
Add an **In-app** action node in a journey and select your template. Connect the node to an event edge so messages materialize when customers hit that step.
For real-time delivery, pair journey in-app nodes with qualifying customer events. Your app should call `GET /inapp/capabilities` to learn which `eventTypes` trigger a refresh.
## Analytics
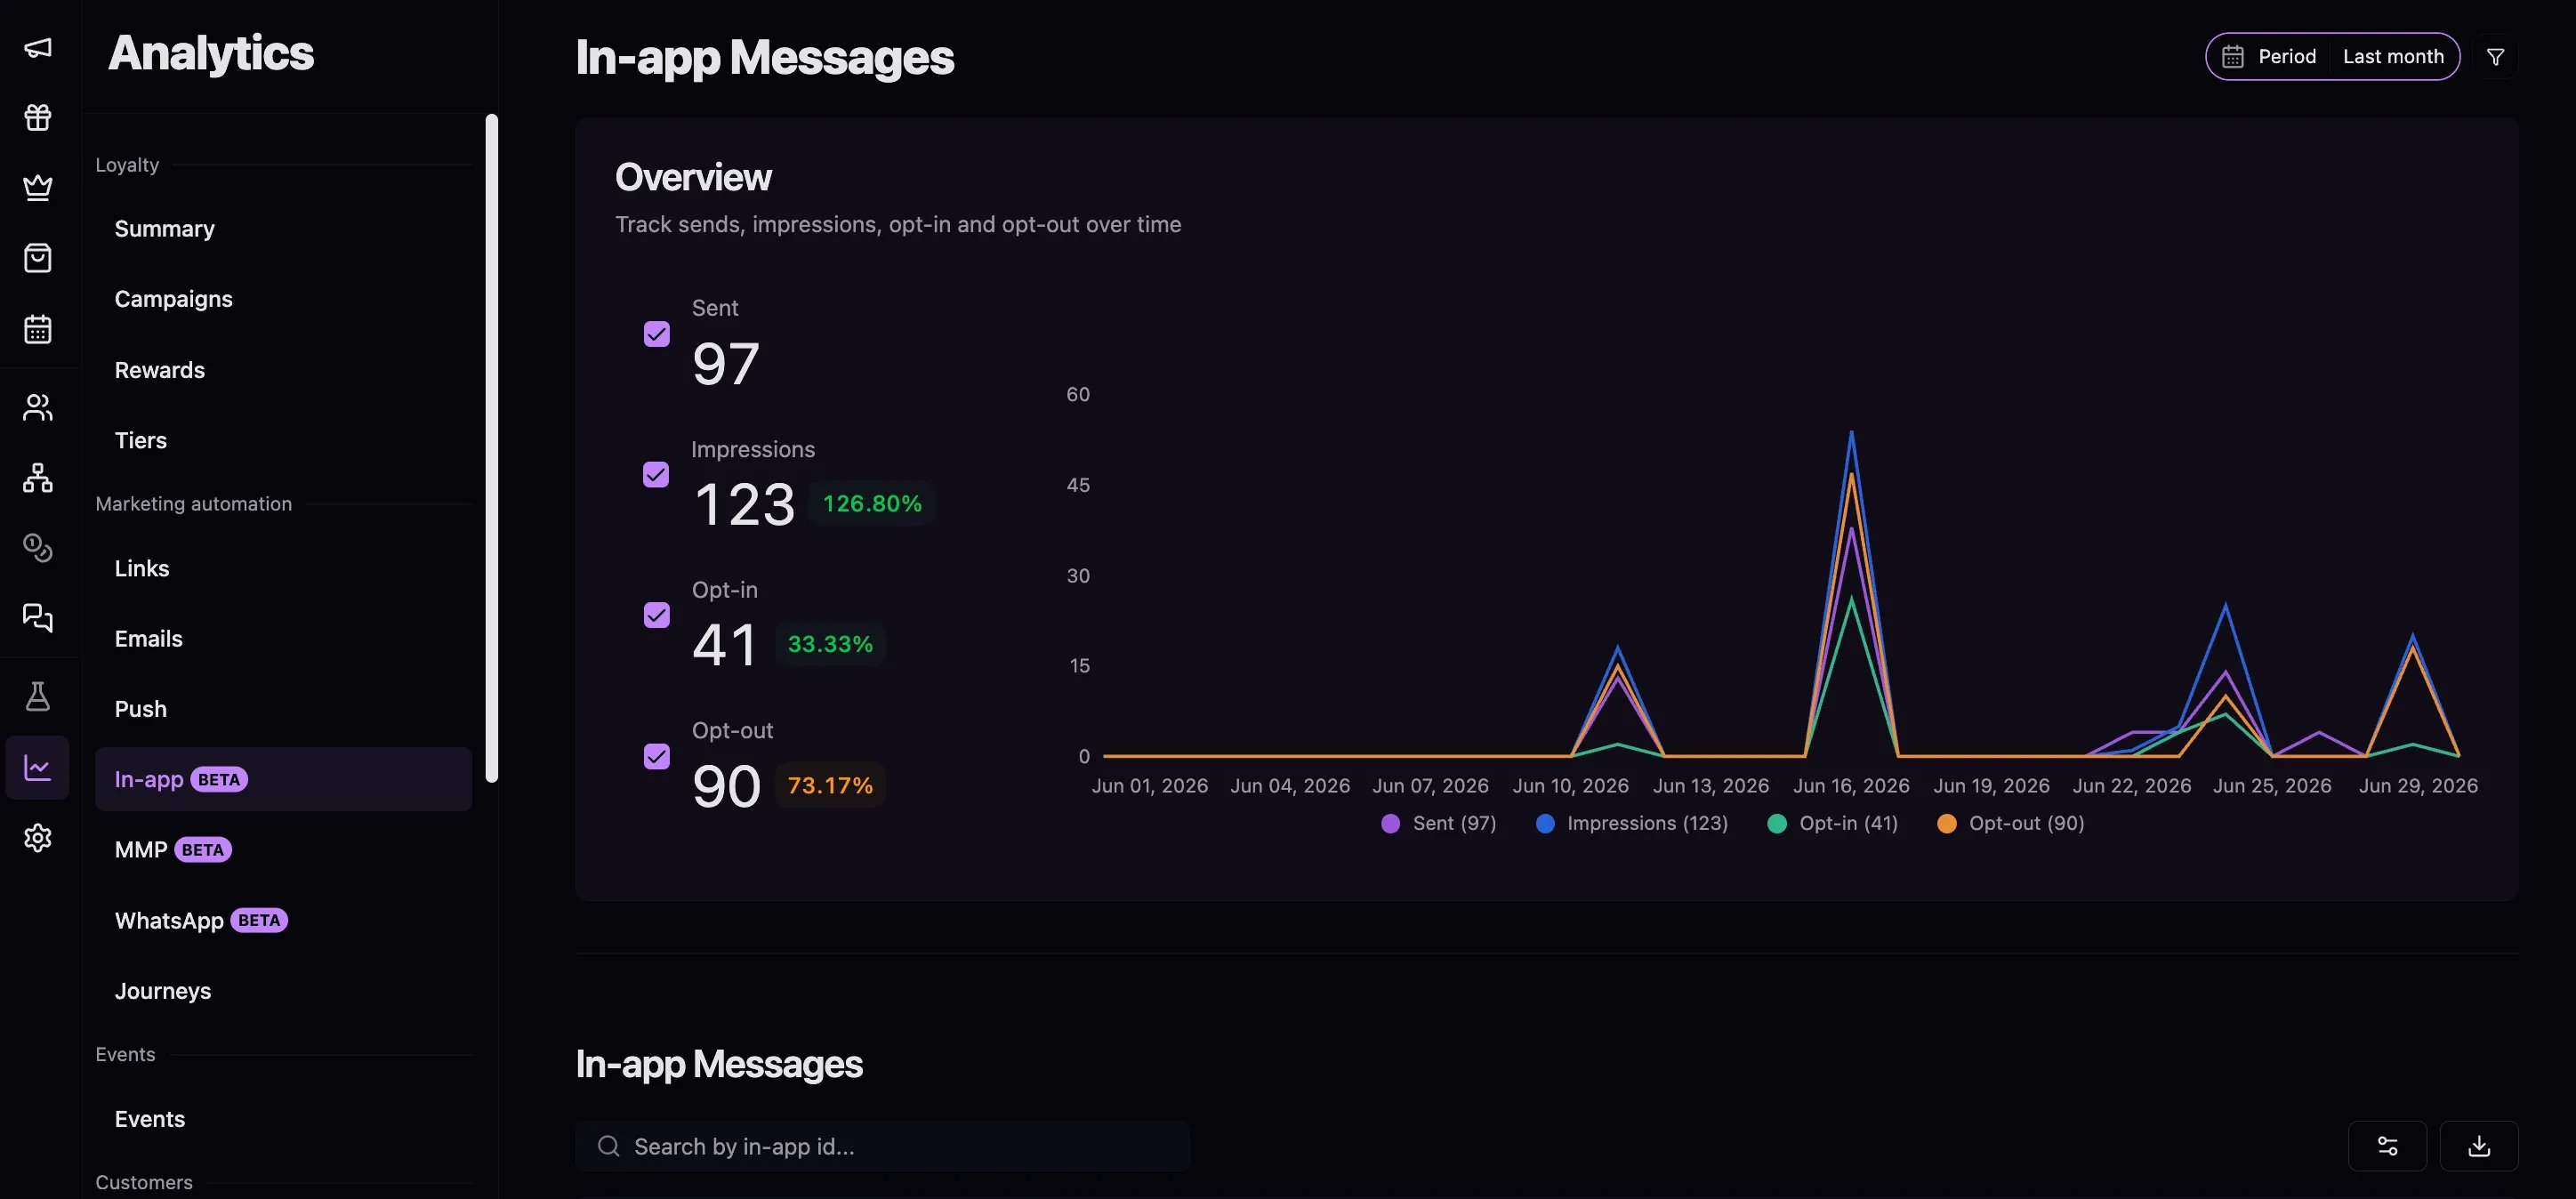
Open **Analytics → In-app** to review delivery, impressions, clicks, and dismissals.
Use the iOS and Android previews to validate layout before saving.
## Step 4: Test and schedule
**Send test** delivers the template to a test audience so you can verify rendering on real devices.
**Schedule** materializes messages for a selected audience at a chosen time. Large audiences are subject to the in-app send limit shown in the scheduler.
## Step 5: Use in journeys
Add an **In-app** action node in a journey and select your template. Connect the node to an event edge so messages materialize when customers hit that step.
For real-time delivery, pair journey in-app nodes with qualifying customer events. Your app should call `GET /inapp/capabilities` to learn which `eventTypes` trigger a refresh.
## Analytics
Open **Analytics → In-app** to review delivery, impressions, clicks, and dismissals.
 ## Next steps
* [Integrate in-app messages](/guides/in-app-messages) — connect your mobile app
* [Integrate in-app messages](/api-reference/guides/integrate-in-app-messages) — API examples
* [In-app messages concept](/concepts/in-app-messages) — lifecycle and configuration reference
## Next steps
* [Integrate in-app messages](/guides/in-app-messages) — connect your mobile app
* [Integrate in-app messages](/api-reference/guides/integrate-in-app-messages) — API examples
* [In-app messages concept](/concepts/in-app-messages) — lifecycle and configuration reference