> ## Documentation Index
> Fetch the complete documentation index at: https://docs.masivo.ai/llms.txt
> Use this file to discover all available pages before exploring further.
# Journeys
> Learn how to create and manage automated customer journeys in Masivo
## What you'll learn
By the end of this guide, you'll know how to build sophisticated automated workflows that respond to customer behavior in real-time, creating personalized experiences that drive engagement and conversions.
## Step 1: Access the journeys section
Navigate to **Marketing Automation > Journeys** in your dashboard. This is your command center for creating automated customer experiences.
Click the **New journey** button to start building your first automation workflow.
## Step 2: Define your journey foundation
Start by establishing the core parameters that will guide your automation:
**Name your journey strategically**: Use descriptive names like "New Customer Onboarding" or "Cart Abandonment Recovery." This helps you quickly identify the purpose when managing multiple journeys.
**Choose your audience wisely**:
* **Specific audience**: Select this when you want to target customers with particular characteristics (VIP customers, recent purchasers, etc.)
* **All customers**: Choose this for universal experiences like welcome sequences or general announcements
Start with a specific audience for your first journey. It's easier to create
targeted, effective automation when you know exactly who you're reaching.
## Step 3: Build your automation workflow
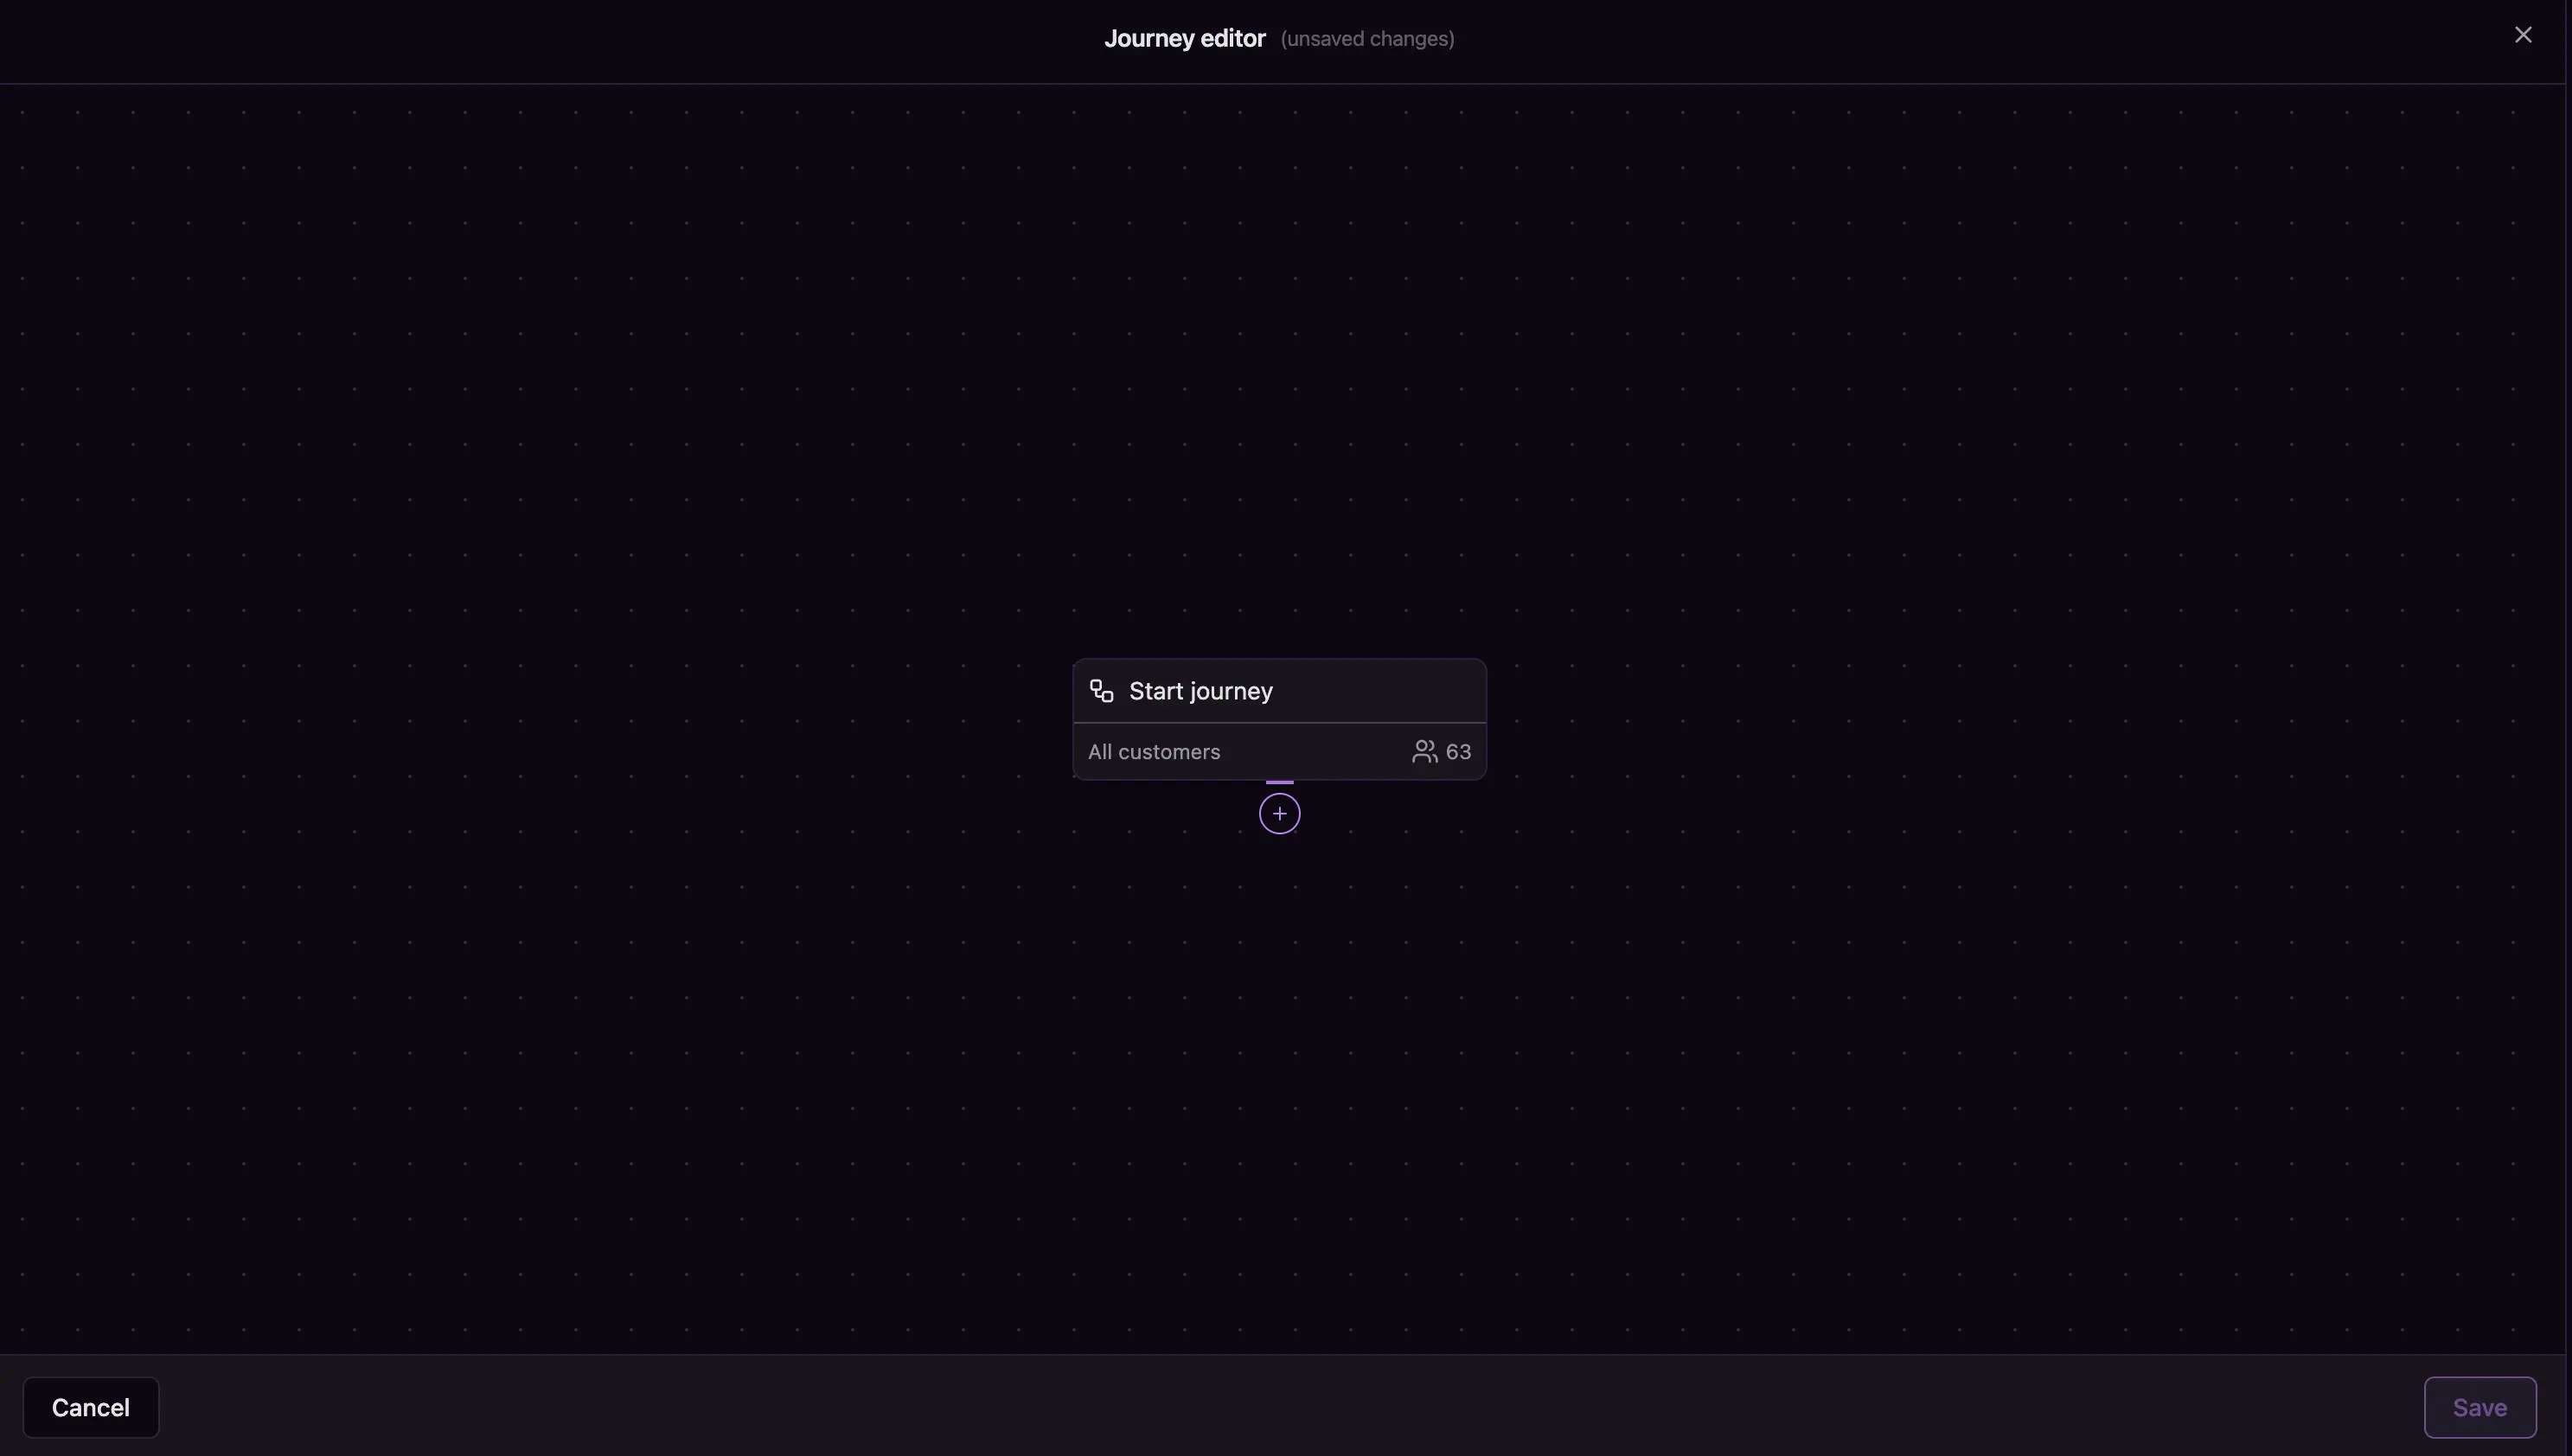 Now you'll create the actual automation using the visual journey editor. Think of this as building a flowchart that responds to customer actions.
### Create your first journey step
Every journey starts with a trigger. Here's how to set it up:
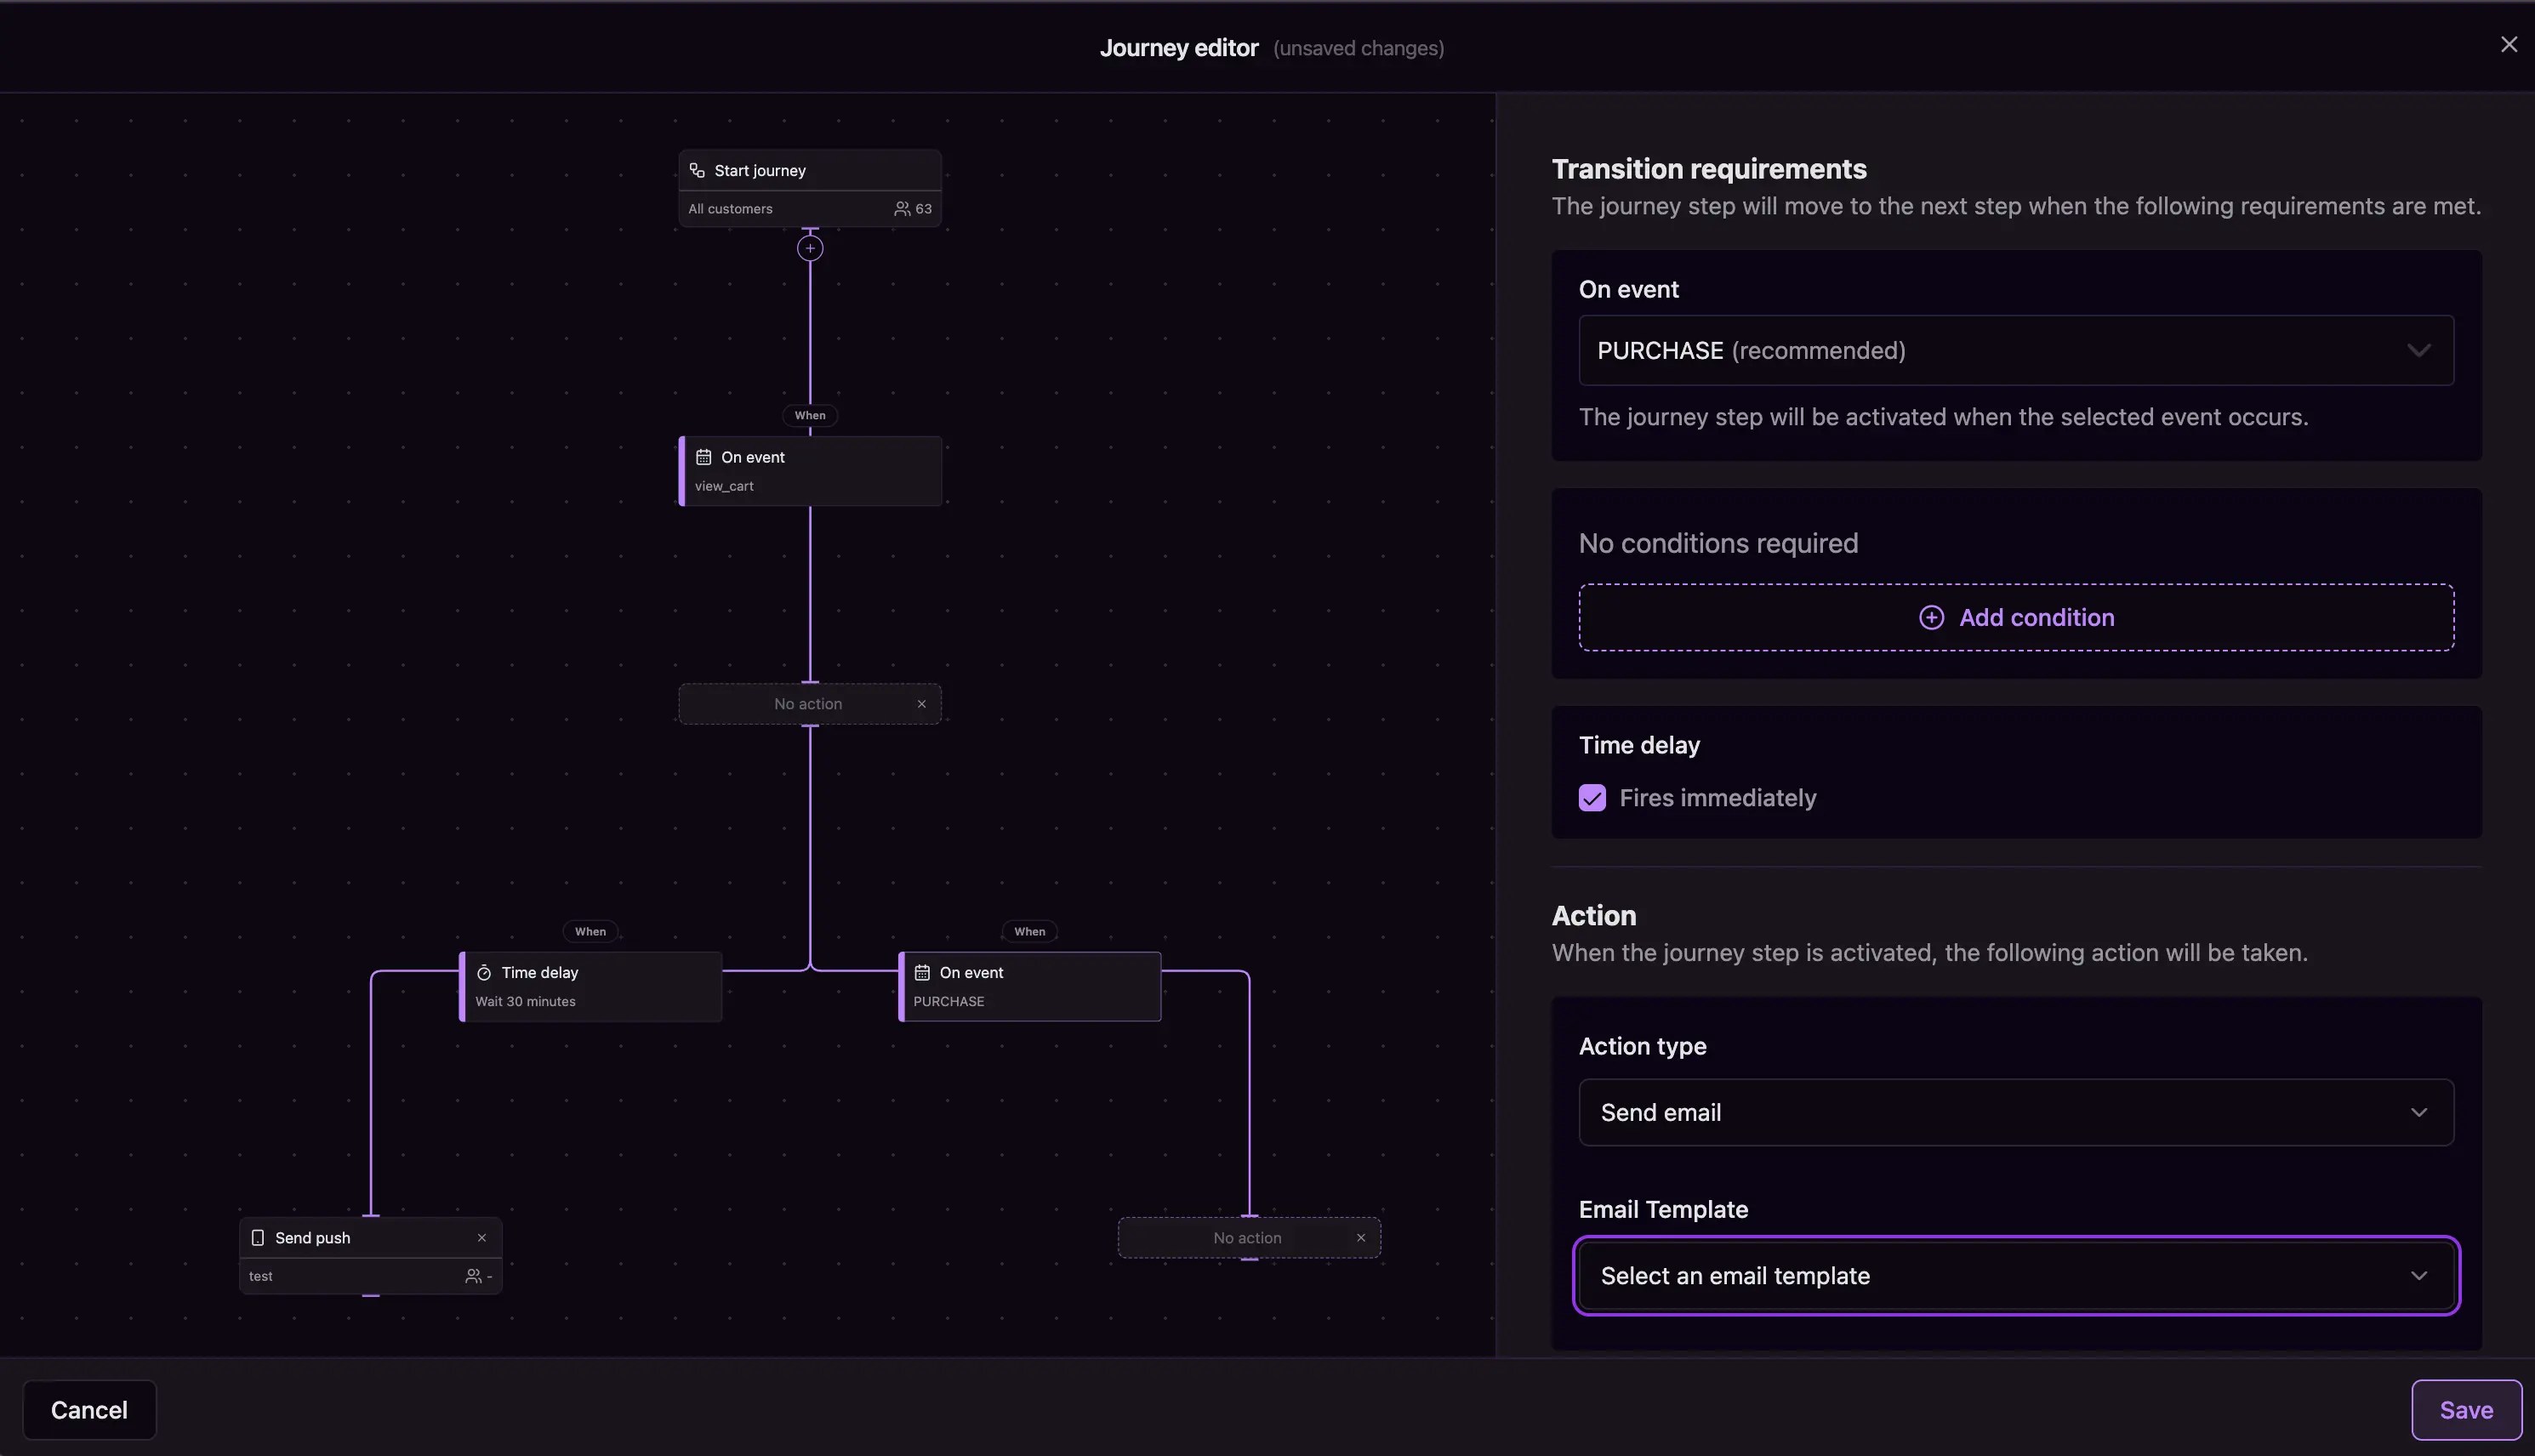
**1. Choose your trigger event**: Select what customer action will start this automation
**2. Set your conditions**: Define who qualifies for this step
**3. Configure time delay**: Decide when the action should happen (configured in minutes):
* **Fires immediately**: For urgent communications like order confirmations
* **Custom wait time**: Add strategic delays (e.g., wait 60 minutes)
**4. Define the action**: Choose what happens when conditions are met:
* **Send email**: Send a personalized email using your templates
* **Send push notification**: Deliver a mobile notification
* **Send WhatsApp message**: Send an approved WhatsApp template
* **No action**: Continue to the next step without communication
Now you'll create the actual automation using the visual journey editor. Think of this as building a flowchart that responds to customer actions.
### Create your first journey step
Every journey starts with a trigger. Here's how to set it up:
**1. Choose your trigger event**: Select what customer action will start this automation
**2. Set your conditions**: Define who qualifies for this step
**3. Configure time delay**: Decide when the action should happen (configured in minutes):
* **Fires immediately**: For urgent communications like order confirmations
* **Custom wait time**: Add strategic delays (e.g., wait 60 minutes)
**4. Define the action**: Choose what happens when conditions are met:
* **Send email**: Send a personalized email using your templates
* **Send push notification**: Deliver a mobile notification
* **Send WhatsApp message**: Send an approved WhatsApp template
* **No action**: Continue to the next step without communication
 ## Step 4: Connect your templates
When you select **Send email**, **Send push notification**, or
**Send WhatsApp message** actions, you'll choose from your existing templates:
**For email actions**: Select from your email templates or create new ones directly from the journey editor.
**For push actions**: Choose from your push notification templates to maintain consistent messaging.
**For WhatsApp actions**: Select an approved WhatsApp template configured for
your account.
If you don't have templates yet, create them first using the Email Templates,
Push Templates, or WhatsApp Templates sections. This ensures your journey has
compelling content ready to go.
## Split variants (A/B paths)
Use split variants when you want to divide customers into different paths by
percentage (for example, Variant A = 70%, Variant B = 30%).
## Step 4: Connect your templates
When you select **Send email**, **Send push notification**, or
**Send WhatsApp message** actions, you'll choose from your existing templates:
**For email actions**: Select from your email templates or create new ones directly from the journey editor.
**For push actions**: Choose from your push notification templates to maintain consistent messaging.
**For WhatsApp actions**: Select an approved WhatsApp template configured for
your account.
If you don't have templates yet, create them first using the Email Templates,
Push Templates, or WhatsApp Templates sections. This ensures your journey has
compelling content ready to go.
## Split variants (A/B paths)
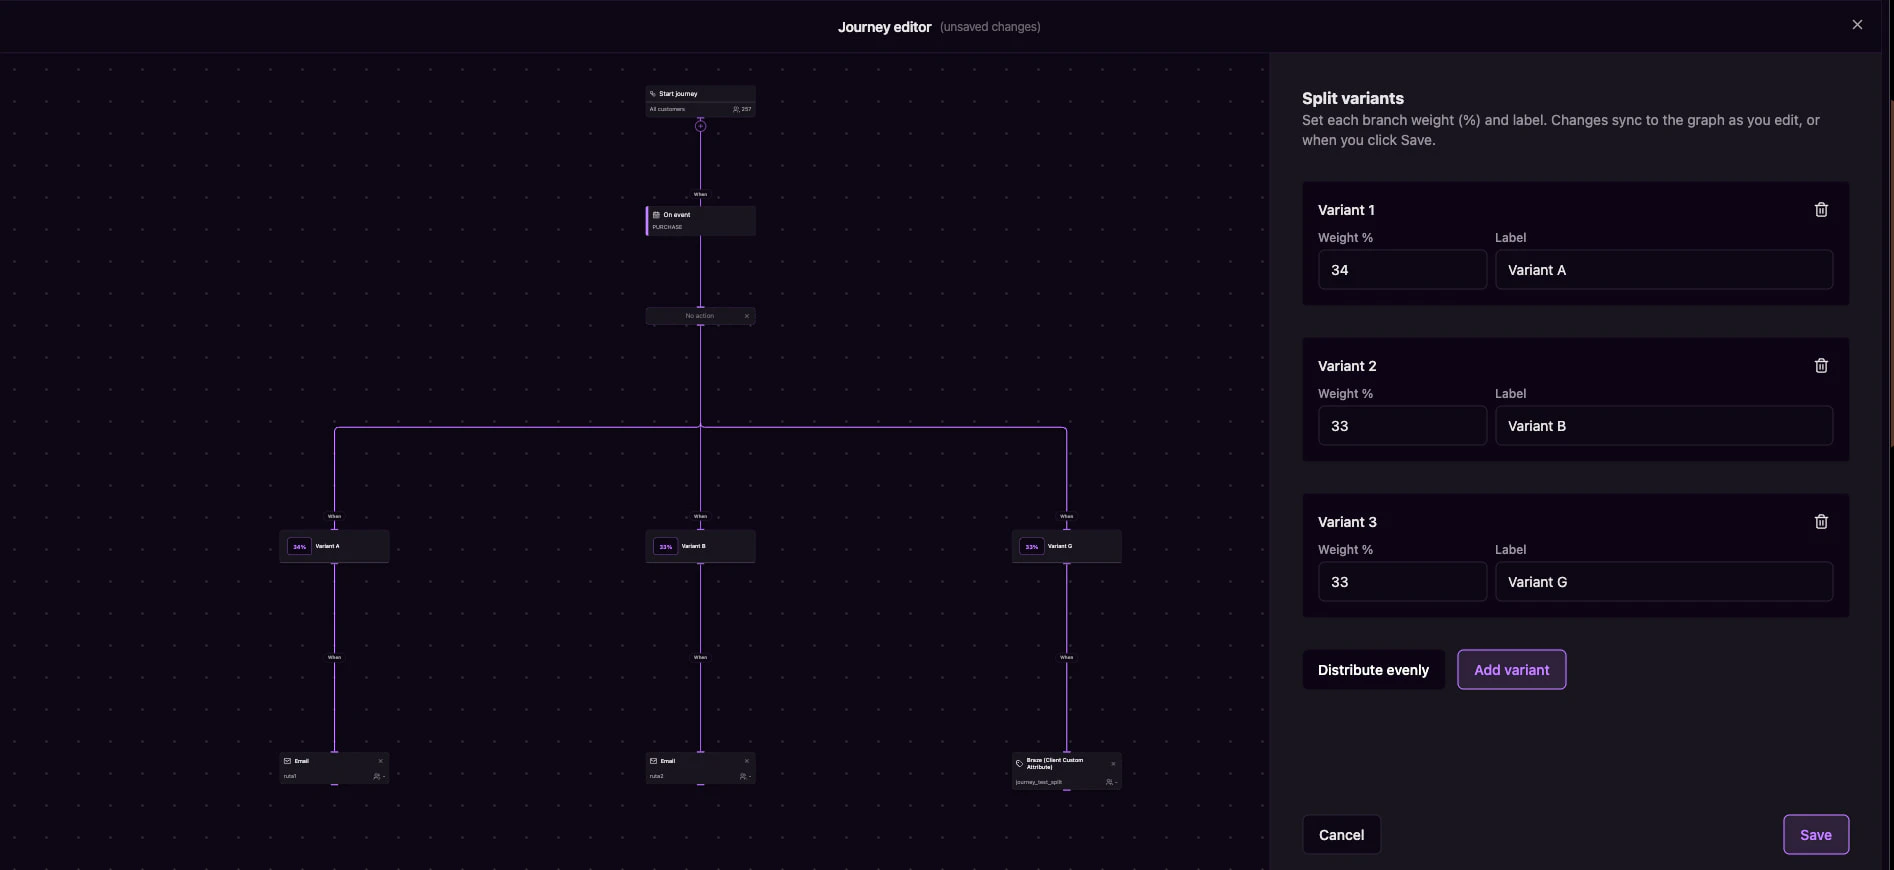
Use split variants when you want to divide customers into different paths by
percentage (for example, Variant A = 70%, Variant B = 30%).
 ### Where you can create a split
* You can create only **one split per journey**
* The split can be inserted only on **first-level steps** (direct children of
`Start journey`)
* After a split exists, you can still add regular nodes, but you cannot insert
a second split
### How to add more variants
After creating the split, click the split node to open the split form and use
**Add variant**.
* Do not use the `+` menu to create additional variants
* Variant branches are managed from the split form
### Variant rules
* Minimum weight: `0`
* Maximum weight: `100`
* Maximum variants per split: `8`
* If variants exist, total weight must be exactly `100%`
A variant with `0%` is valid and works as a paused branch while you keep its
structure configured.
### How distribution works
Customers are assigned to one variant using the configured weights.
* Example: A = 70%, B = 30%
* If 10,000 customers reach the split, expected distribution is \~7,000 in A and
\~3,000 in B
Percentages are probabilistic, so short-term numbers may vary slightly.
## What you've accomplished
You've built an automated customer journey that responds intelligently to
customer behavior, delivering personalized experiences at scale. Your journey
will now work 24/7 to engage customers at the perfect moments.
## Related architecture
* [Activity & events](/resources/data-architecture#activity-events) — How qualifying events enter the loyalty and journey pipeline
* [Marketing & destinations](/resources/data-architecture#marketing-destinations) — How journeys and messages fit into the marketing data flow
### Where you can create a split
* You can create only **one split per journey**
* The split can be inserted only on **first-level steps** (direct children of
`Start journey`)
* After a split exists, you can still add regular nodes, but you cannot insert
a second split
### How to add more variants
After creating the split, click the split node to open the split form and use
**Add variant**.
* Do not use the `+` menu to create additional variants
* Variant branches are managed from the split form
### Variant rules
* Minimum weight: `0`
* Maximum weight: `100`
* Maximum variants per split: `8`
* If variants exist, total weight must be exactly `100%`
A variant with `0%` is valid and works as a paused branch while you keep its
structure configured.
### How distribution works
Customers are assigned to one variant using the configured weights.
* Example: A = 70%, B = 30%
* If 10,000 customers reach the split, expected distribution is \~7,000 in A and
\~3,000 in B
Percentages are probabilistic, so short-term numbers may vary slightly.
## What you've accomplished
You've built an automated customer journey that responds intelligently to
customer behavior, delivering personalized experiences at scale. Your journey
will now work 24/7 to engage customers at the perfect moments.
## Related architecture
* [Activity & events](/resources/data-architecture#activity-events) — How qualifying events enter the loyalty and journey pipeline
* [Marketing & destinations](/resources/data-architecture#marketing-destinations) — How journeys and messages fit into the marketing data flow