> ## Documentation Index
> Fetch the complete documentation index at: https://docs.masivo.ai/llms.txt
> Use this file to discover all available pages before exploring further.
# Push notifications
> Learn how to create and manage push notification templates in Masivo
## What you'll learn
By the end of this guide, you'll know how to create compelling push notification templates that grab attention, drive engagement, and seamlessly integrate with your automated marketing workflows.
## SDK Integration Requirements
Push notifications will not work without proper SDK integration. Complete FCM
setup before creating templates to ensure functionality.
**Required setup**: Your app needs FCM configuration for both iOS and Android platforms. This includes:
* Firebase project configuration with proper certificates
* Platform-specific setup (APNs for iOS, FCM for Android)
* Permission handling for notification access
* Token management for device targeting
**Testing requirements**: Push notifications must be tested on physical devices with preview builds - they won't work with Expo development servers or emulators.
**Helpful resources**:
* [React Native Firebase Documentation](https://rnfirebase.io/messaging/usage) - Official implementation guide
* [Expo Firebase Setup](https://rnfirebase.io/#your-expo-project) - Required configuration for Expo projects
* [Push settings guide](/guides/settings/push) - Configure Firebase SDK and token duration in Masivo
## Step 1: Access the push templates section
Navigate to **Marketing Automation > Push templates** in your dashboard. This is where you'll create and manage all your reusable push notification designs.
Click the **New push template** button to start creating your first push notification template.
## Step 2: Set up your template foundation
Start by establishing the organizational details that will help you manage your templates effectively:
**Choose a descriptive name**: Use specific names like "Flash Sale Alert" or "Order Shipped Notification" instead of generic ones. This makes templates easy to find when building journeys.
**Add a helpful description**: Write a brief note about when you'll use this template. For example: "Sent when customers abandon their cart for 2+ hours" or "Welcome notification for new app users."
## Step 3: Craft your notification content
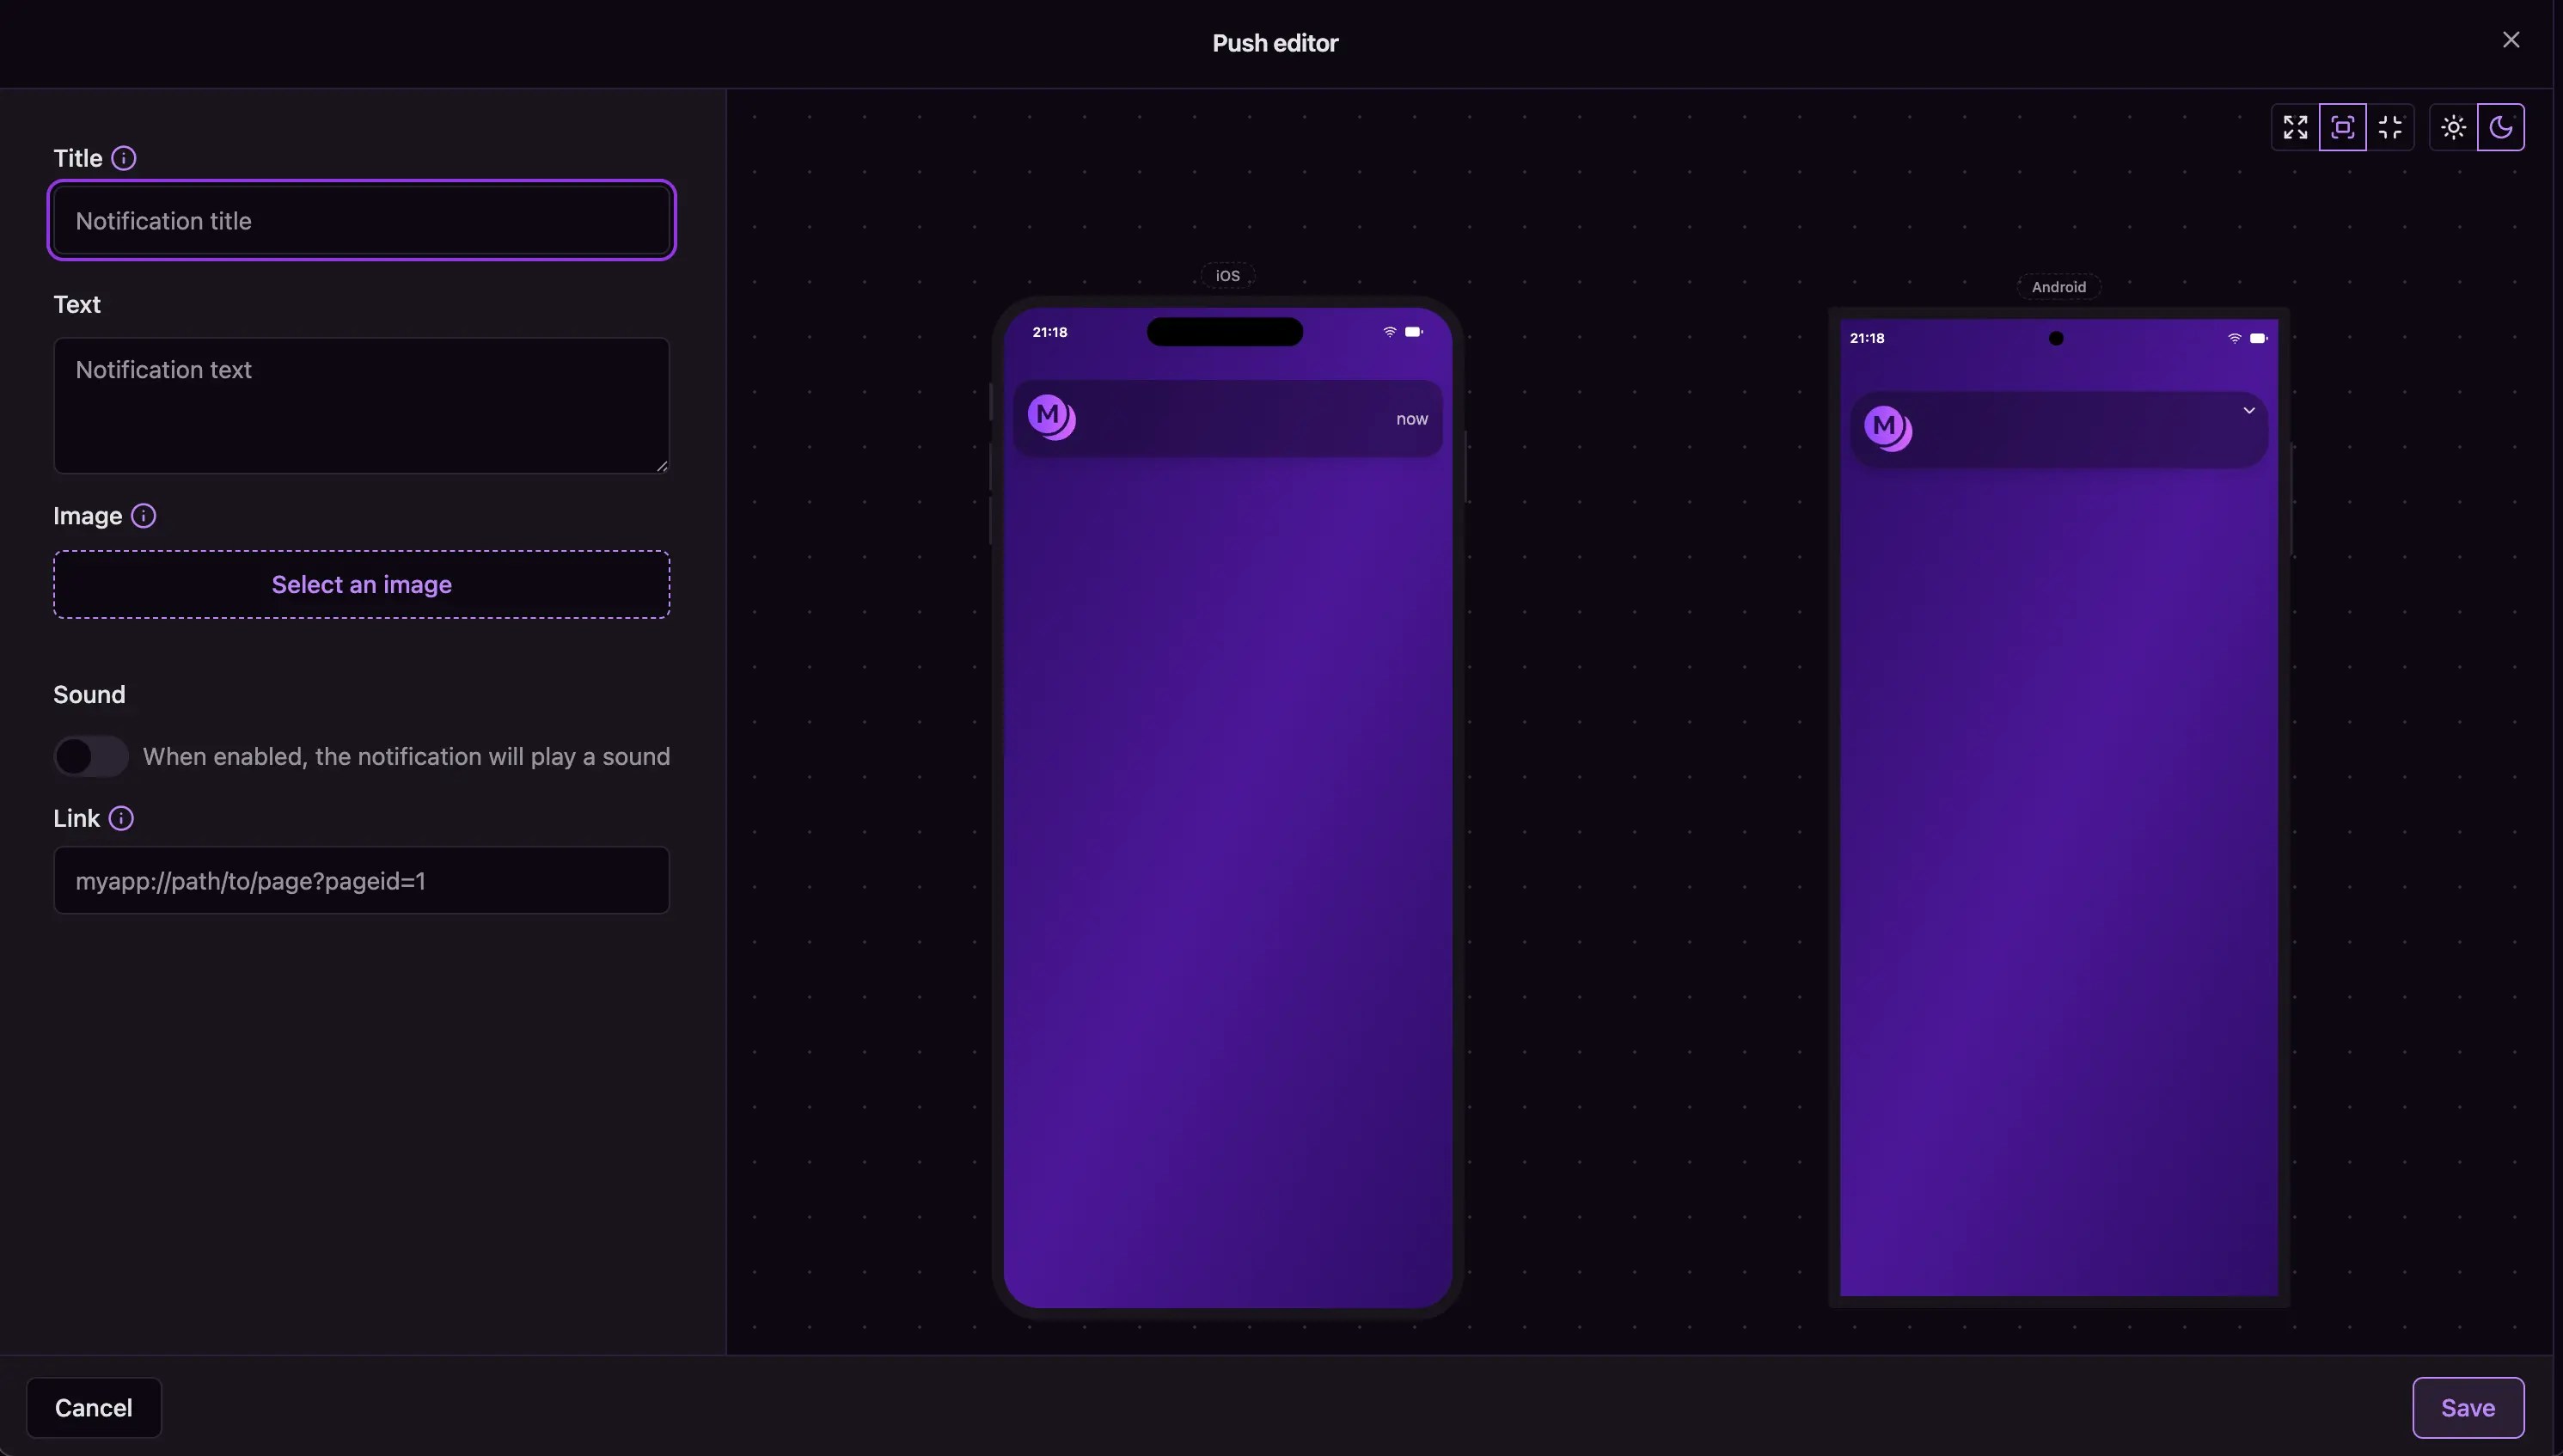 Now create the actual notification that customers will see on their devices:
**Write a compelling title**: This is your headline - make it count. Keep it under 50 characters for optimal display across devices. Examples:
* "Your order is on its way!"
* "50% off ends tonight!"
**Create engaging body text**: This is your main message. Keep it concise but informative, ideally under 120 characters. Focus on value and urgency:
* "Track your package and see estimated delivery time"
* "Don't miss out - shop your favorites before midnight"
**Add visual impact with images**: Upload an image that enhances your message. The image appears as a **rich notification attachment** in the OS tray — it is not your app's launcher icon or logo.
Use high-quality visuals that:
* Support your notification's purpose
* Maintain brand consistency
* Display well at small sizes
* Follow platform guidelines (JPEG, PNG, or GIF formats)
**Configure sound settings**:
Now create the actual notification that customers will see on their devices:
**Write a compelling title**: This is your headline - make it count. Keep it under 50 characters for optimal display across devices. Examples:
* "Your order is on its way!"
* "50% off ends tonight!"
**Create engaging body text**: This is your main message. Keep it concise but informative, ideally under 120 characters. Focus on value and urgency:
* "Track your package and see estimated delivery time"
* "Don't miss out - shop your favorites before midnight"
**Add visual impact with images**: Upload an image that enhances your message. The image appears as a **rich notification attachment** in the OS tray — it is not your app's launcher icon or logo.
Use high-quality visuals that:
* Support your notification's purpose
* Maintain brand consistency
* Display well at small sizes
* Follow platform guidelines (JPEG, PNG, or GIF formats)
**Configure sound settings**:
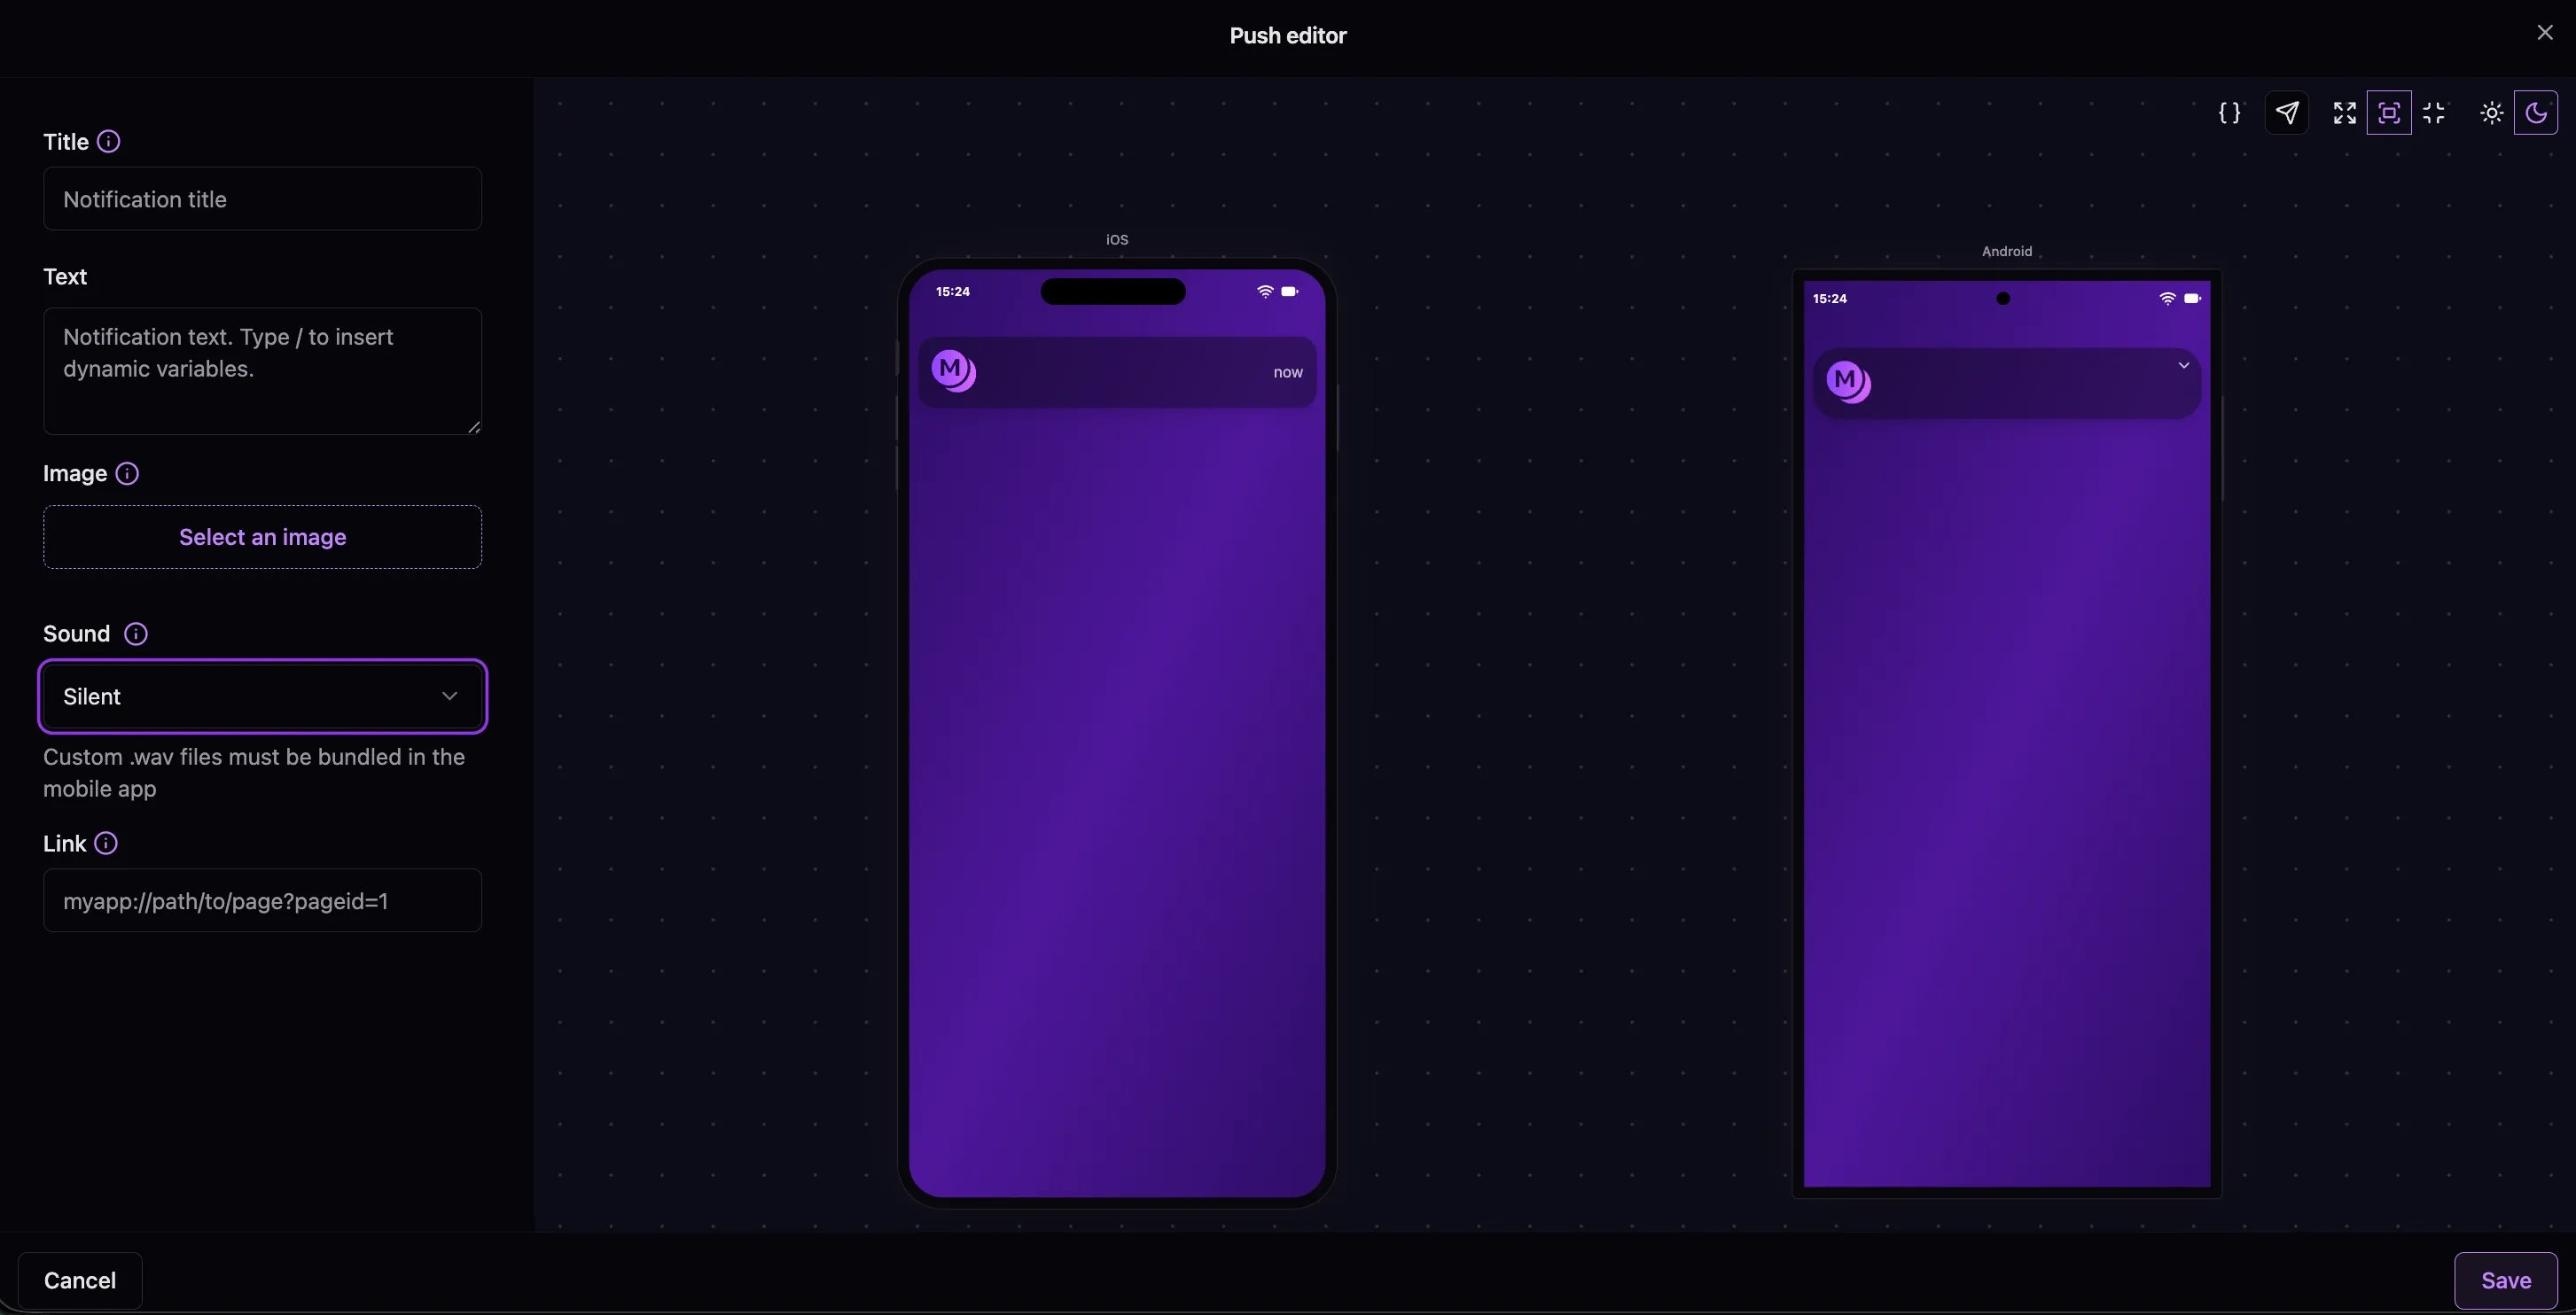 * Leave the field empty for a silent notification.
* Enter `default` to use the device's default notification sound.
* Enter a bundled `.wav` filename such as `order_ready.wav` for a custom sound.
Custom notification audio cannot be uploaded to or streamed from Masivo. iOS
and Android require the file to be included in the installed mobile app. The
filename in the template must exactly match that bundled file. See the [mobile
integration
guide](/api-reference/guides/integrate-push-notification#custom-notification-sounds).
**Set up deep linking**: Add a URL that opens a specific screen in your app when users tap the notification:
* Product pages for promotional notifications
* Order tracking for shipping updates
* Specific app sections for engagement notifications
## Step 4: Optimize for different platforms
* Leave the field empty for a silent notification.
* Enter `default` to use the device's default notification sound.
* Enter a bundled `.wav` filename such as `order_ready.wav` for a custom sound.
Custom notification audio cannot be uploaded to or streamed from Masivo. iOS
and Android require the file to be included in the installed mobile app. The
filename in the template must exactly match that bundled file. See the [mobile
integration
guide](/api-reference/guides/integrate-push-notification#custom-notification-sounds).
**Set up deep linking**: Add a URL that opens a specific screen in your app when users tap the notification:
* Product pages for promotional notifications
* Order tracking for shipping updates
* Specific app sections for engagement notifications
## Step 4: Optimize for different platforms
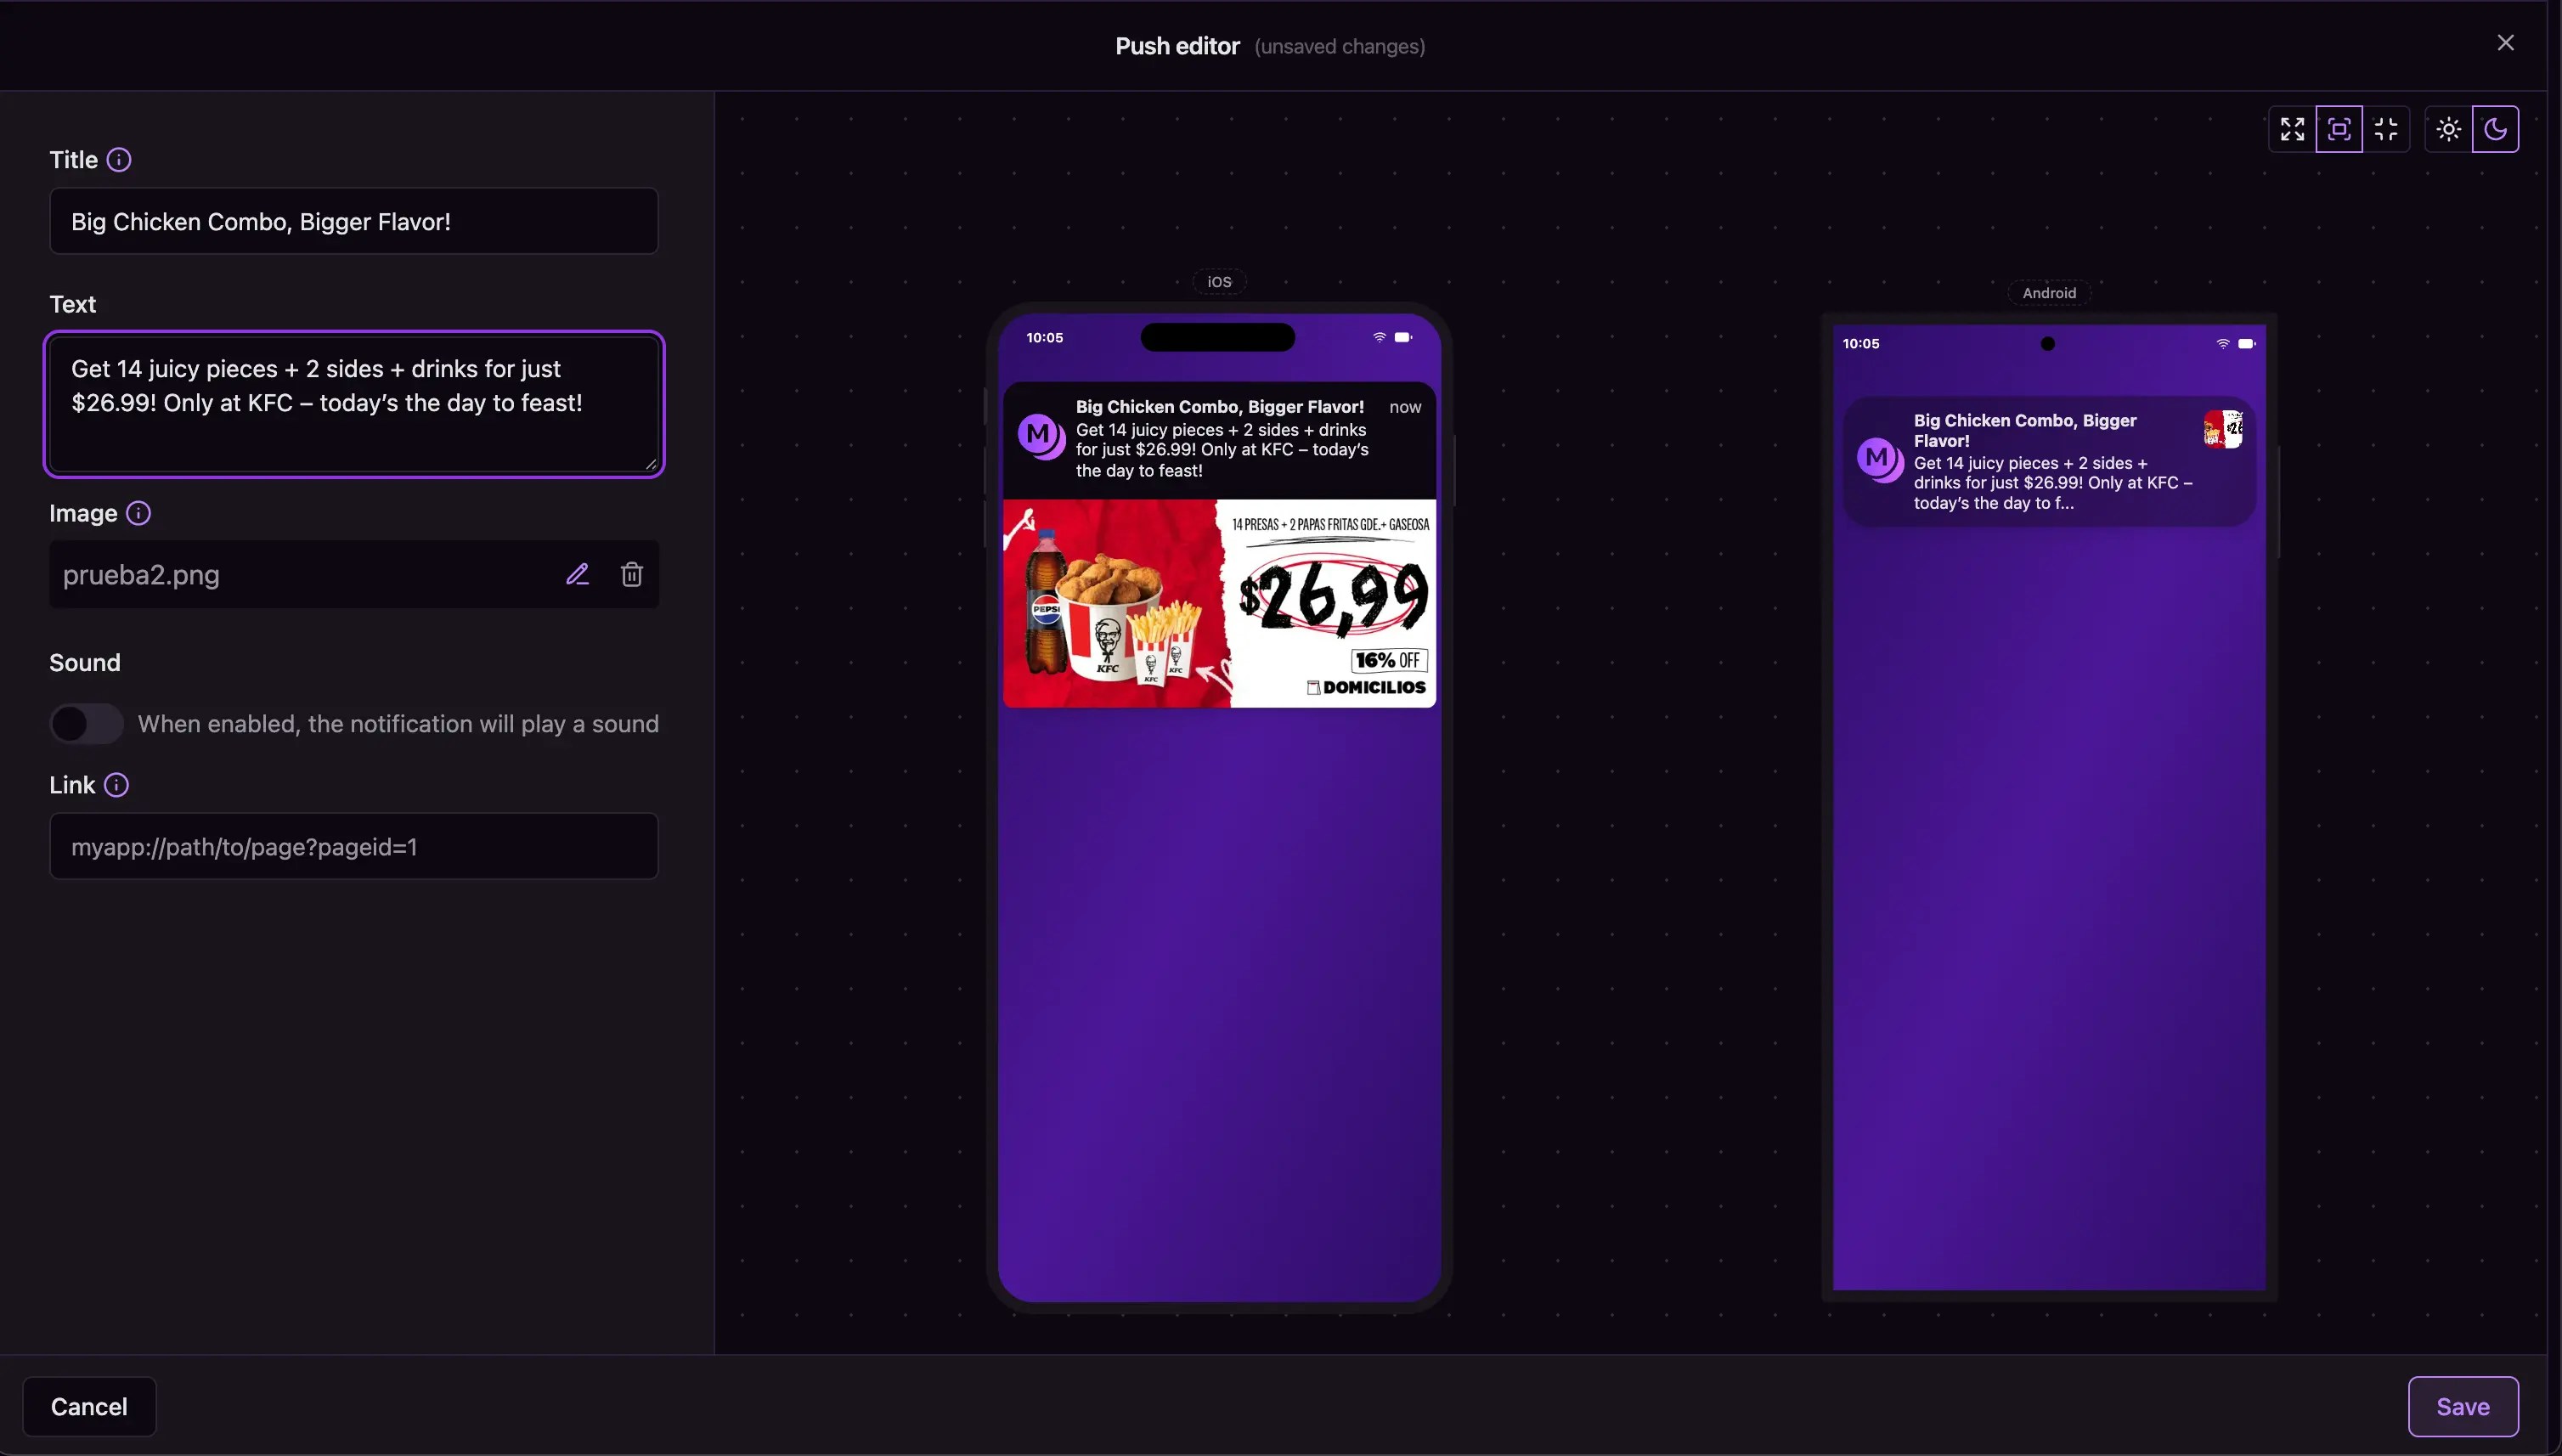 Use the real-time preview to see how your notification appears on both iOS and Android devices:
**iOS preview**: Check that your title and text display properly within iOS notification constraints.
**Android preview**: Verify that your content works well with Android's notification style and length limits.
**Make adjustments**: Refine your content based on how it appears in both previews to ensure optimal display across all devices.
## Step 5: Test and deploy your template
Before using your template in campaigns, it's important to test and understand its reach:
### Send test push notifications
Test your template to ensure it works correctly across different devices:
Use the real-time preview to see how your notification appears on both iOS and Android devices:
**iOS preview**: Check that your title and text display properly within iOS notification constraints.
**Android preview**: Verify that your content works well with Android's notification style and length limits.
**Make adjustments**: Refine your content based on how it appears in both previews to ensure optimal display across all devices.
## Step 5: Test and deploy your template
Before using your template in campaigns, it's important to test and understand its reach:
### Send test push notifications
Test your template to ensure it works correctly across different devices:
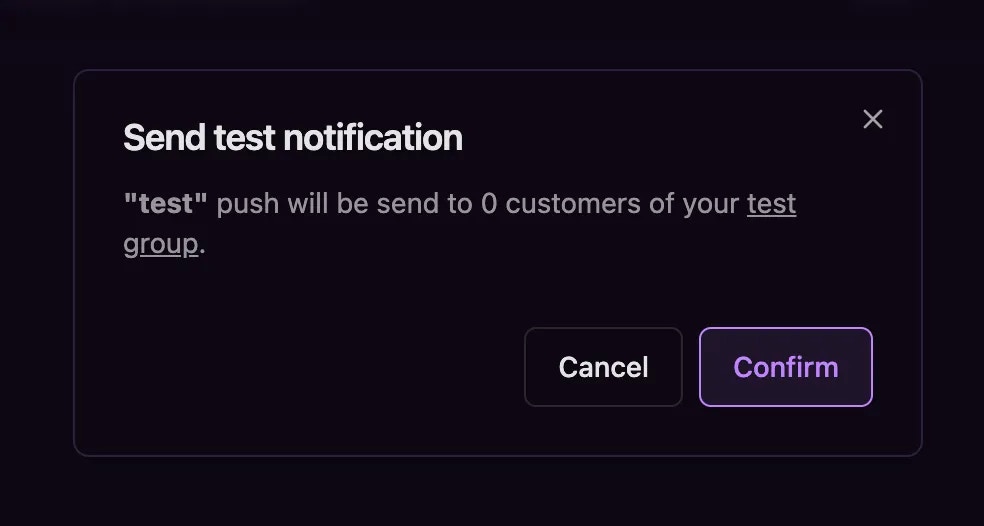 **Use the test function**: Click the **Send test** button in your template actions to send a preview to your test audience.
**Test audience requirements**: Your test group must have customers with registered device tokens. If your test audience is empty or has no device tokens, you'll need to add customers with mobile app installations first.
**Physical device testing**: Push notifications must be tested on actual devices with preview builds - they won't work with development servers or emulators.
### Schedule push notifications
Once your template is ready, you can schedule it for delivery:
**Use the test function**: Click the **Send test** button in your template actions to send a preview to your test audience.
**Test audience requirements**: Your test group must have customers with registered device tokens. If your test audience is empty or has no device tokens, you'll need to add customers with mobile app installations first.
**Physical device testing**: Push notifications must be tested on actual devices with preview builds - they won't work with development servers or emulators.
### Schedule push notifications
Once your template is ready, you can schedule it for delivery:
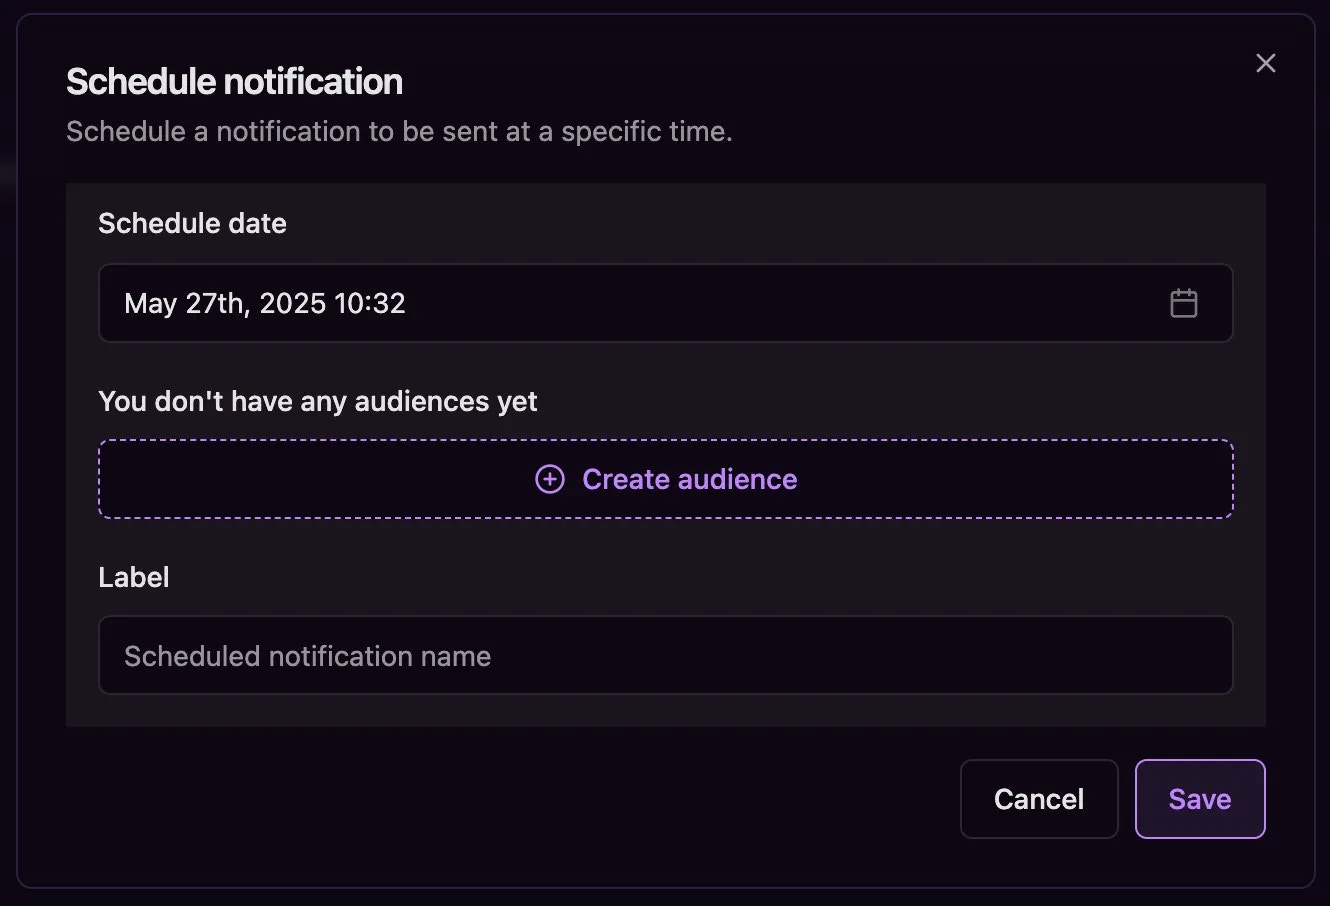 **Schedule for later**: Use the **Schedule** button to set up automated delivery at specific times.
**Choose your audience**: Select which customer segment will receive your push notification campaign.
**Set timing**: Pick the optimal time for your audience based on their activity patterns and time zones.
The system tracks two key metrics for each audience: total audience size and
customers with device tokens. This helps you understand your potential push
notification reach before sending campaigns.
## What you've accomplished
You've created a professional push notification template that captures
attention, communicates value, and drives user action. Your template is now
ready for testing and deployment to engage customers effectively through your
automated marketing workflows.
## Next steps
Once your push notification campaigns are running, you can track their performance and export analytics data:
* **Configure channel settings**: Review [Push settings](/guides/settings/push) to manage Firebase credentials and token duration
* **View analytics**: Navigate to **Analytics > Push** to see delivery rates, opens, and engagement metrics
* **Export data**: Learn how to [export analytics tables to CSV](/guides/analytics-exports) for deeper analysis and reporting
## Related architecture
* [Marketing & destinations](/resources/data-architecture#marketing-destinations) — How push templates are sent through journeys and audience campaigns
**Schedule for later**: Use the **Schedule** button to set up automated delivery at specific times.
**Choose your audience**: Select which customer segment will receive your push notification campaign.
**Set timing**: Pick the optimal time for your audience based on their activity patterns and time zones.
The system tracks two key metrics for each audience: total audience size and
customers with device tokens. This helps you understand your potential push
notification reach before sending campaigns.
## What you've accomplished
You've created a professional push notification template that captures
attention, communicates value, and drives user action. Your template is now
ready for testing and deployment to engage customers effectively through your
automated marketing workflows.
## Next steps
Once your push notification campaigns are running, you can track their performance and export analytics data:
* **Configure channel settings**: Review [Push settings](/guides/settings/push) to manage Firebase credentials and token duration
* **View analytics**: Navigate to **Analytics > Push** to see delivery rates, opens, and engagement metrics
* **Export data**: Learn how to [export analytics tables to CSV](/guides/analytics-exports) for deeper analysis and reporting
## Related architecture
* [Marketing & destinations](/resources/data-architecture#marketing-destinations) — How push templates are sent through journeys and audience campaigns