> ## Documentation Index
> Fetch the complete documentation index at: https://docs.masivo.ai/llms.txt
> Use this file to discover all available pages before exploring further.
# Manage teams
> Learn how to create teams, assign members, and scope resources in Masivo
Teams help large organizations separate analytics visibility without creating multiple Masivo accounts. This guide walks through team setup and day-to-day management.
## Prerequisites
* Account member with `settings:write` to create teams or assign members
* `settings:delete` to remove members
## Create a team
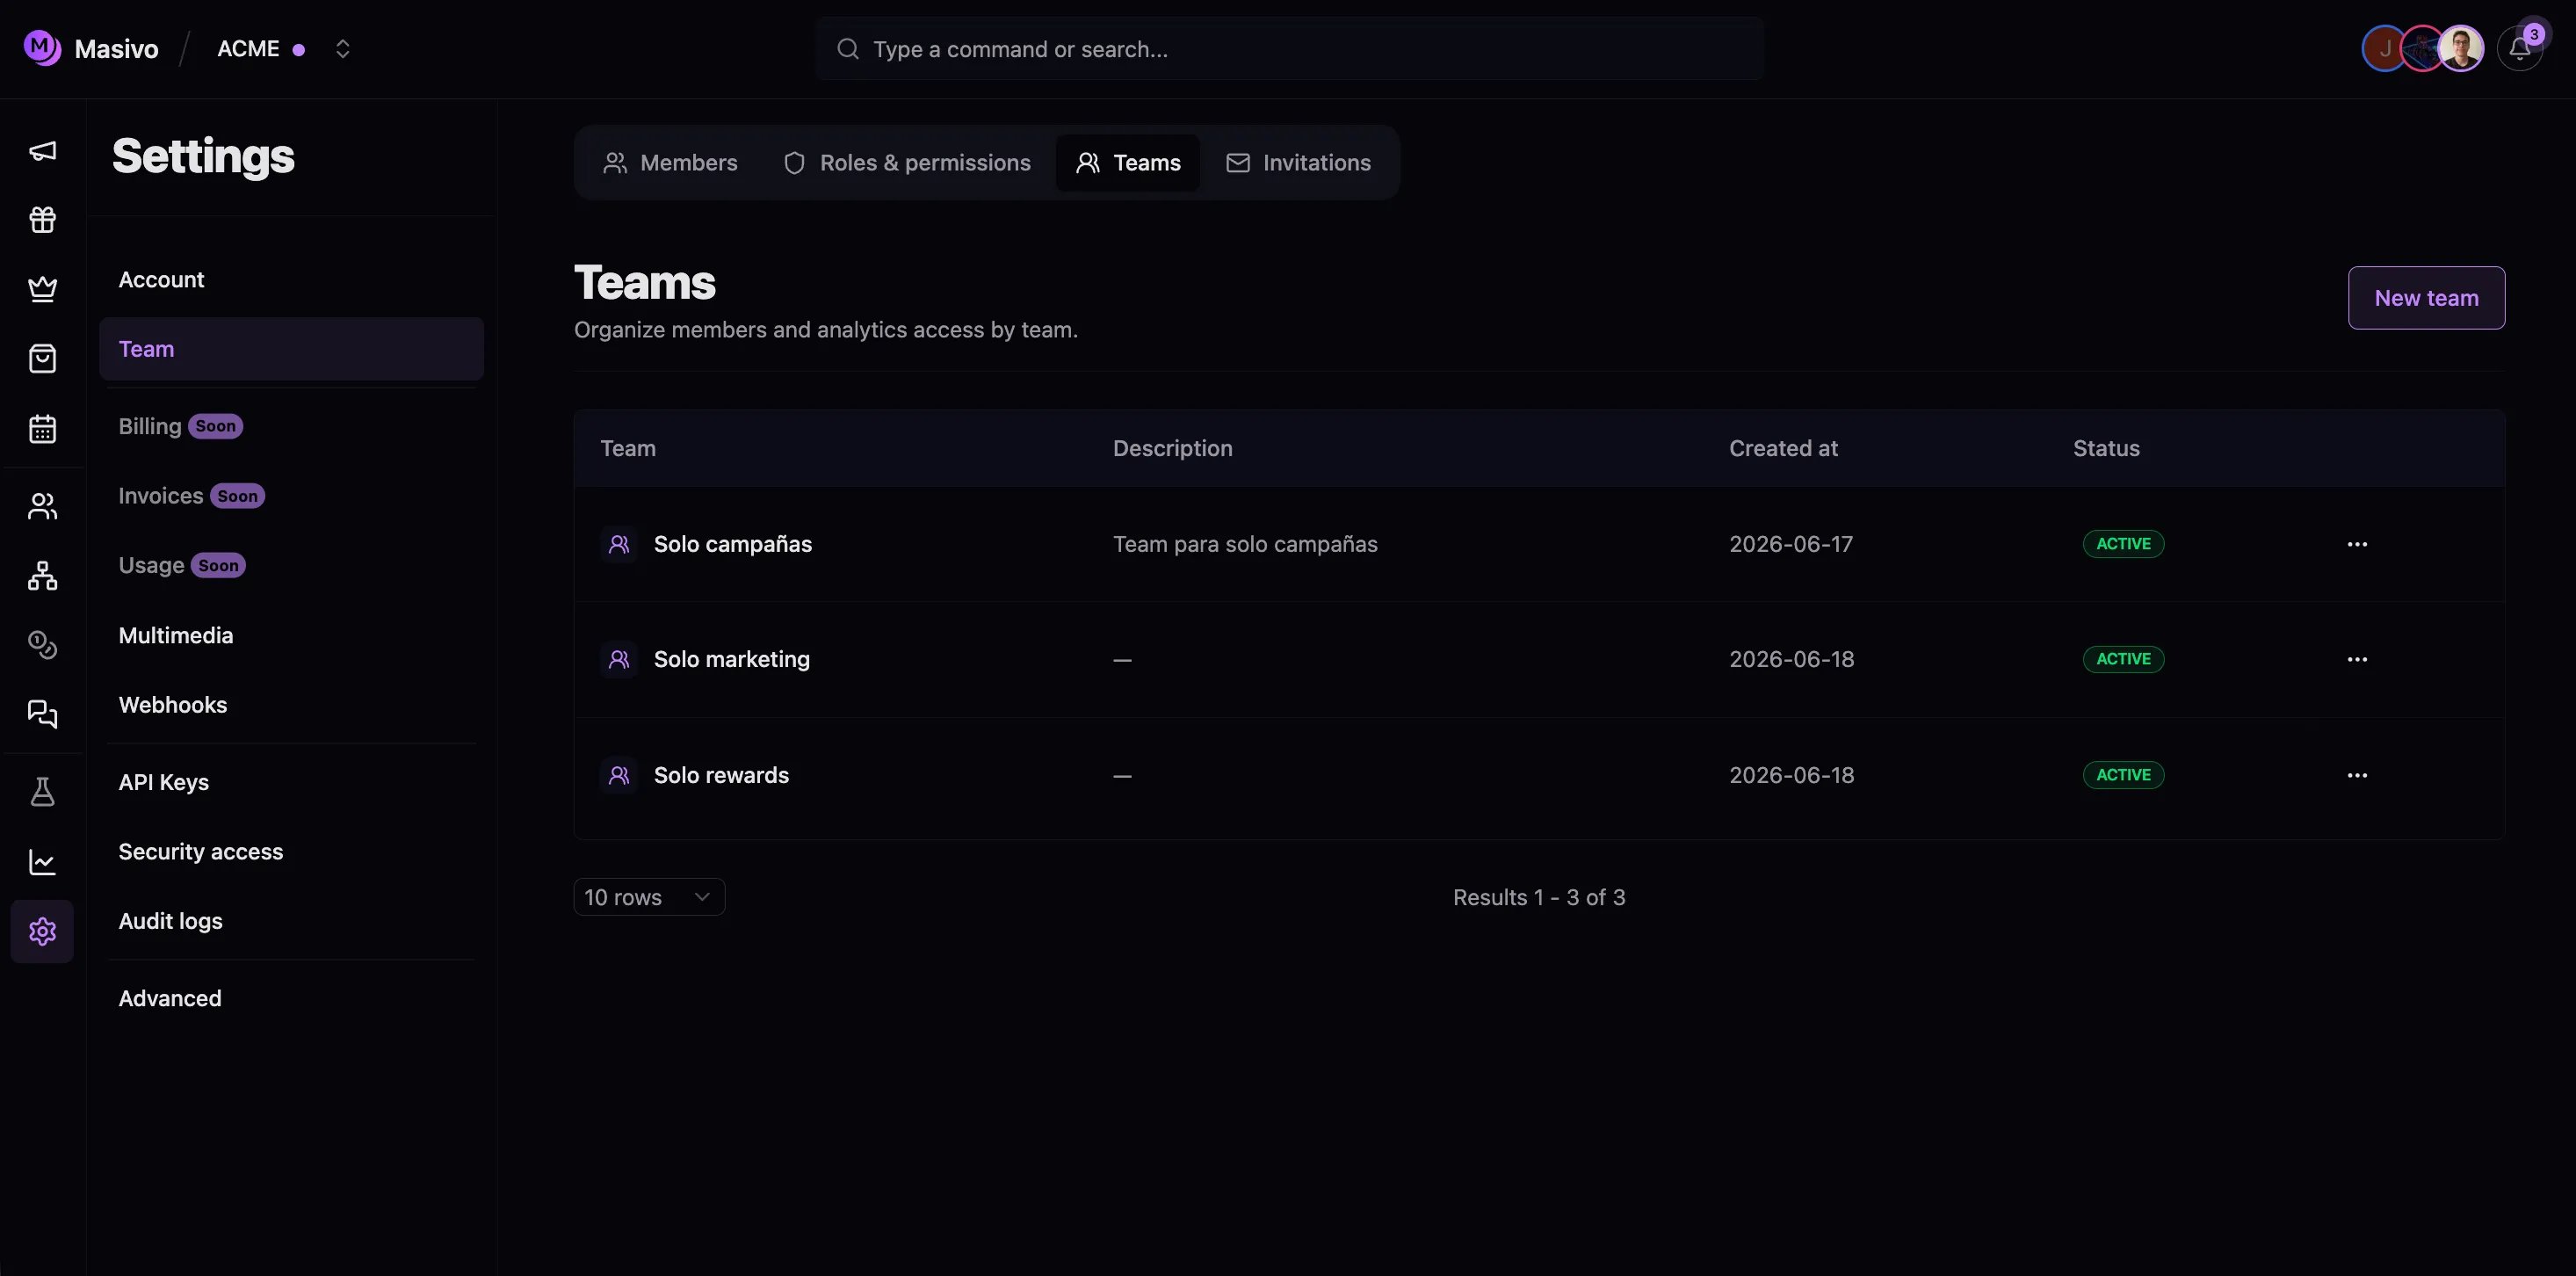
Go to **Settings → Team** and select the **Teams** tab, or navigate directly to `/settings/teams`.
Click **New team**. Enter a **name** and optional **description**.
The team is created with `ACTIVE` status. Open the team detail page to see assigned members.
 ## Assign members to teams
1. Open **Settings → Team → Members**.
2. Find the member row and open the **Teams** column editor.
3. Select one or more teams, or clear all teams for account-wide-only visibility rules.
Members with the **ADMIN** role or the account owner show **All access** and cannot be restricted by team filters.
## Scope a resource to teams
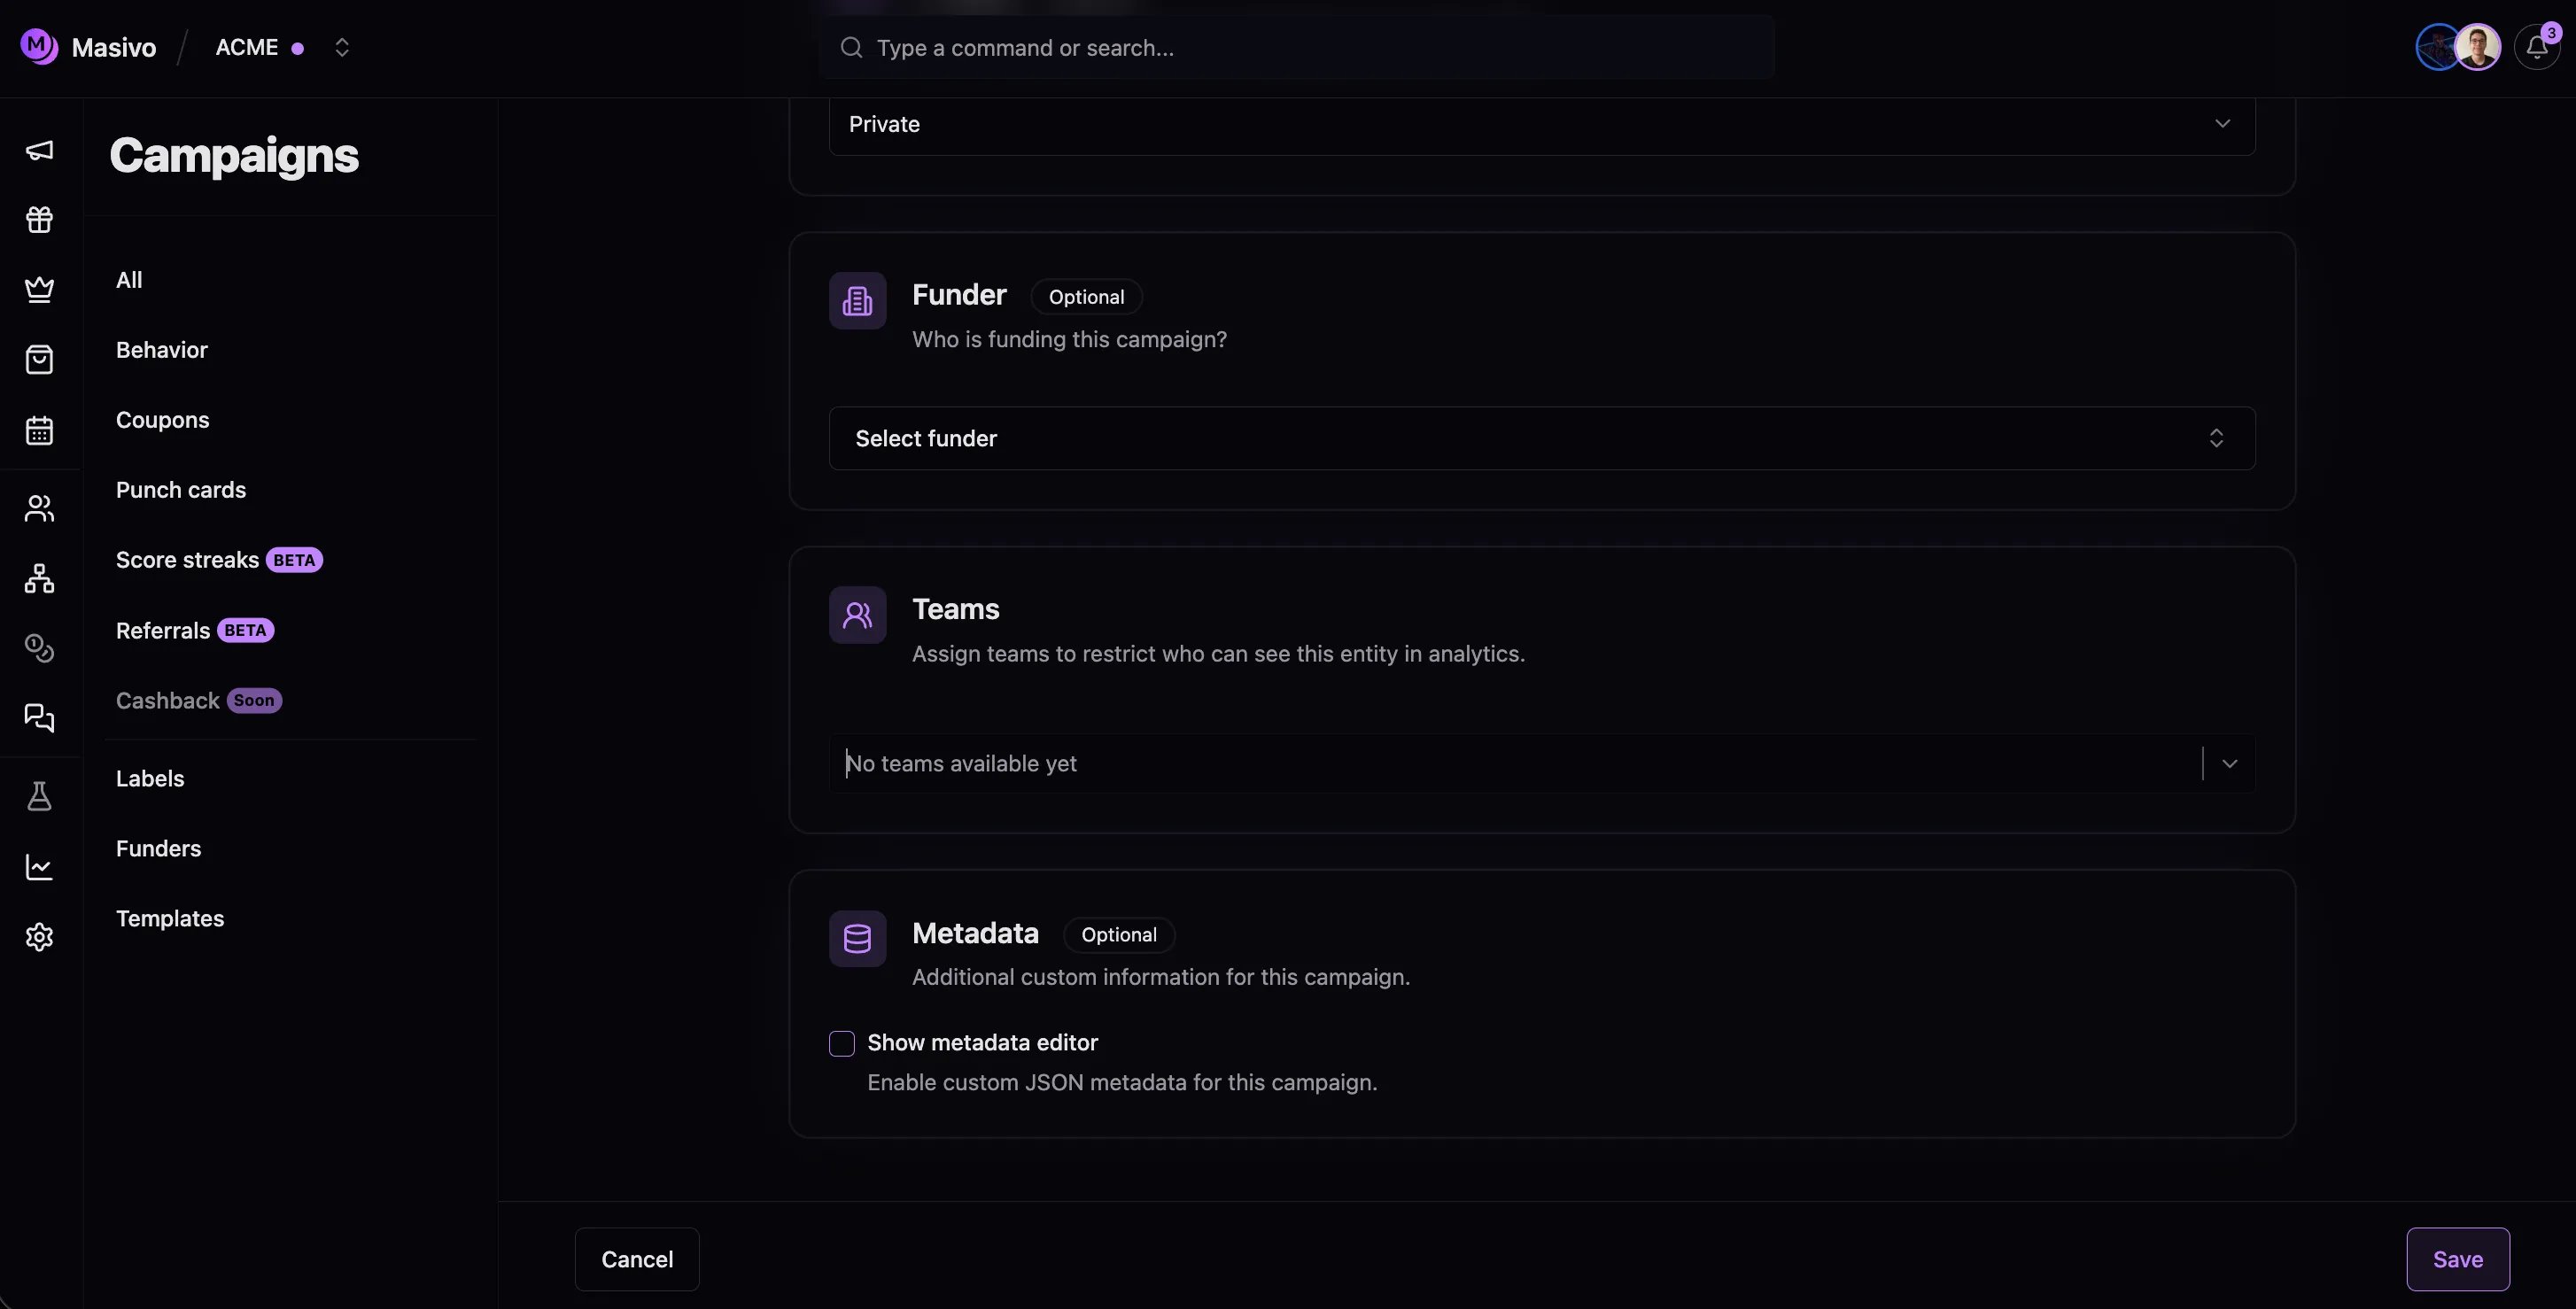
When creating or editing a campaign, reward, journey, or marketing template:
1. Locate the **Teams** field in the form.
2. Select the teams that should see this resource in analytics.
3. Leave **No teams** selected to keep the resource visible to everyone.
## Assign members to teams
1. Open **Settings → Team → Members**.
2. Find the member row and open the **Teams** column editor.
3. Select one or more teams, or clear all teams for account-wide-only visibility rules.
Members with the **ADMIN** role or the account owner show **All access** and cannot be restricted by team filters.
## Scope a resource to teams
When creating or editing a campaign, reward, journey, or marketing template:
1. Locate the **Teams** field in the form.
2. Select the teams that should see this resource in analytics.
3. Leave **No teams** selected to keep the resource visible to everyone.
 ## Invite a new member
1. On **Settings → Team → Members**, click **Invite member**.
2. Enter the email address. Masivo sends an invitation valid for 24 hours.
3. After acceptance, assign a **role** and **teams** to the new member.
Track pending invitations under **Settings → Team → Invitations**.
## Leave the account
Non-owner members can leave from the **Leave team** action on the Members tab. The account owner cannot leave without transferring ownership first.
## Related documentation
* [Teams concept](/concepts/teams)
* [Transfer account ownership](/guides/transfer-account-ownership)
## Invite a new member
1. On **Settings → Team → Members**, click **Invite member**.
2. Enter the email address. Masivo sends an invitation valid for 24 hours.
3. After acceptance, assign a **role** and **teams** to the new member.
Track pending invitations under **Settings → Team → Invitations**.
## Leave the account
Non-owner members can leave from the **Leave team** action on the Members tab. The account owner cannot leave without transferring ownership first.
## Related documentation
* [Teams concept](/concepts/teams)
* [Transfer account ownership](/guides/transfer-account-ownership)