> ## Documentation Index
> Fetch the complete documentation index at: https://docs.masivo.ai/llms.txt
> Use this file to discover all available pages before exploring further.
# Email settings
> Configure email domains, Google Postmaster, footer templates, and tracking
## What you'll learn
By the end of this guide, you'll know how to configure email settings in
Masivo, including domain verification, Google Postmaster, footer templates, and tracking controls.
## Step 1: Open email settings
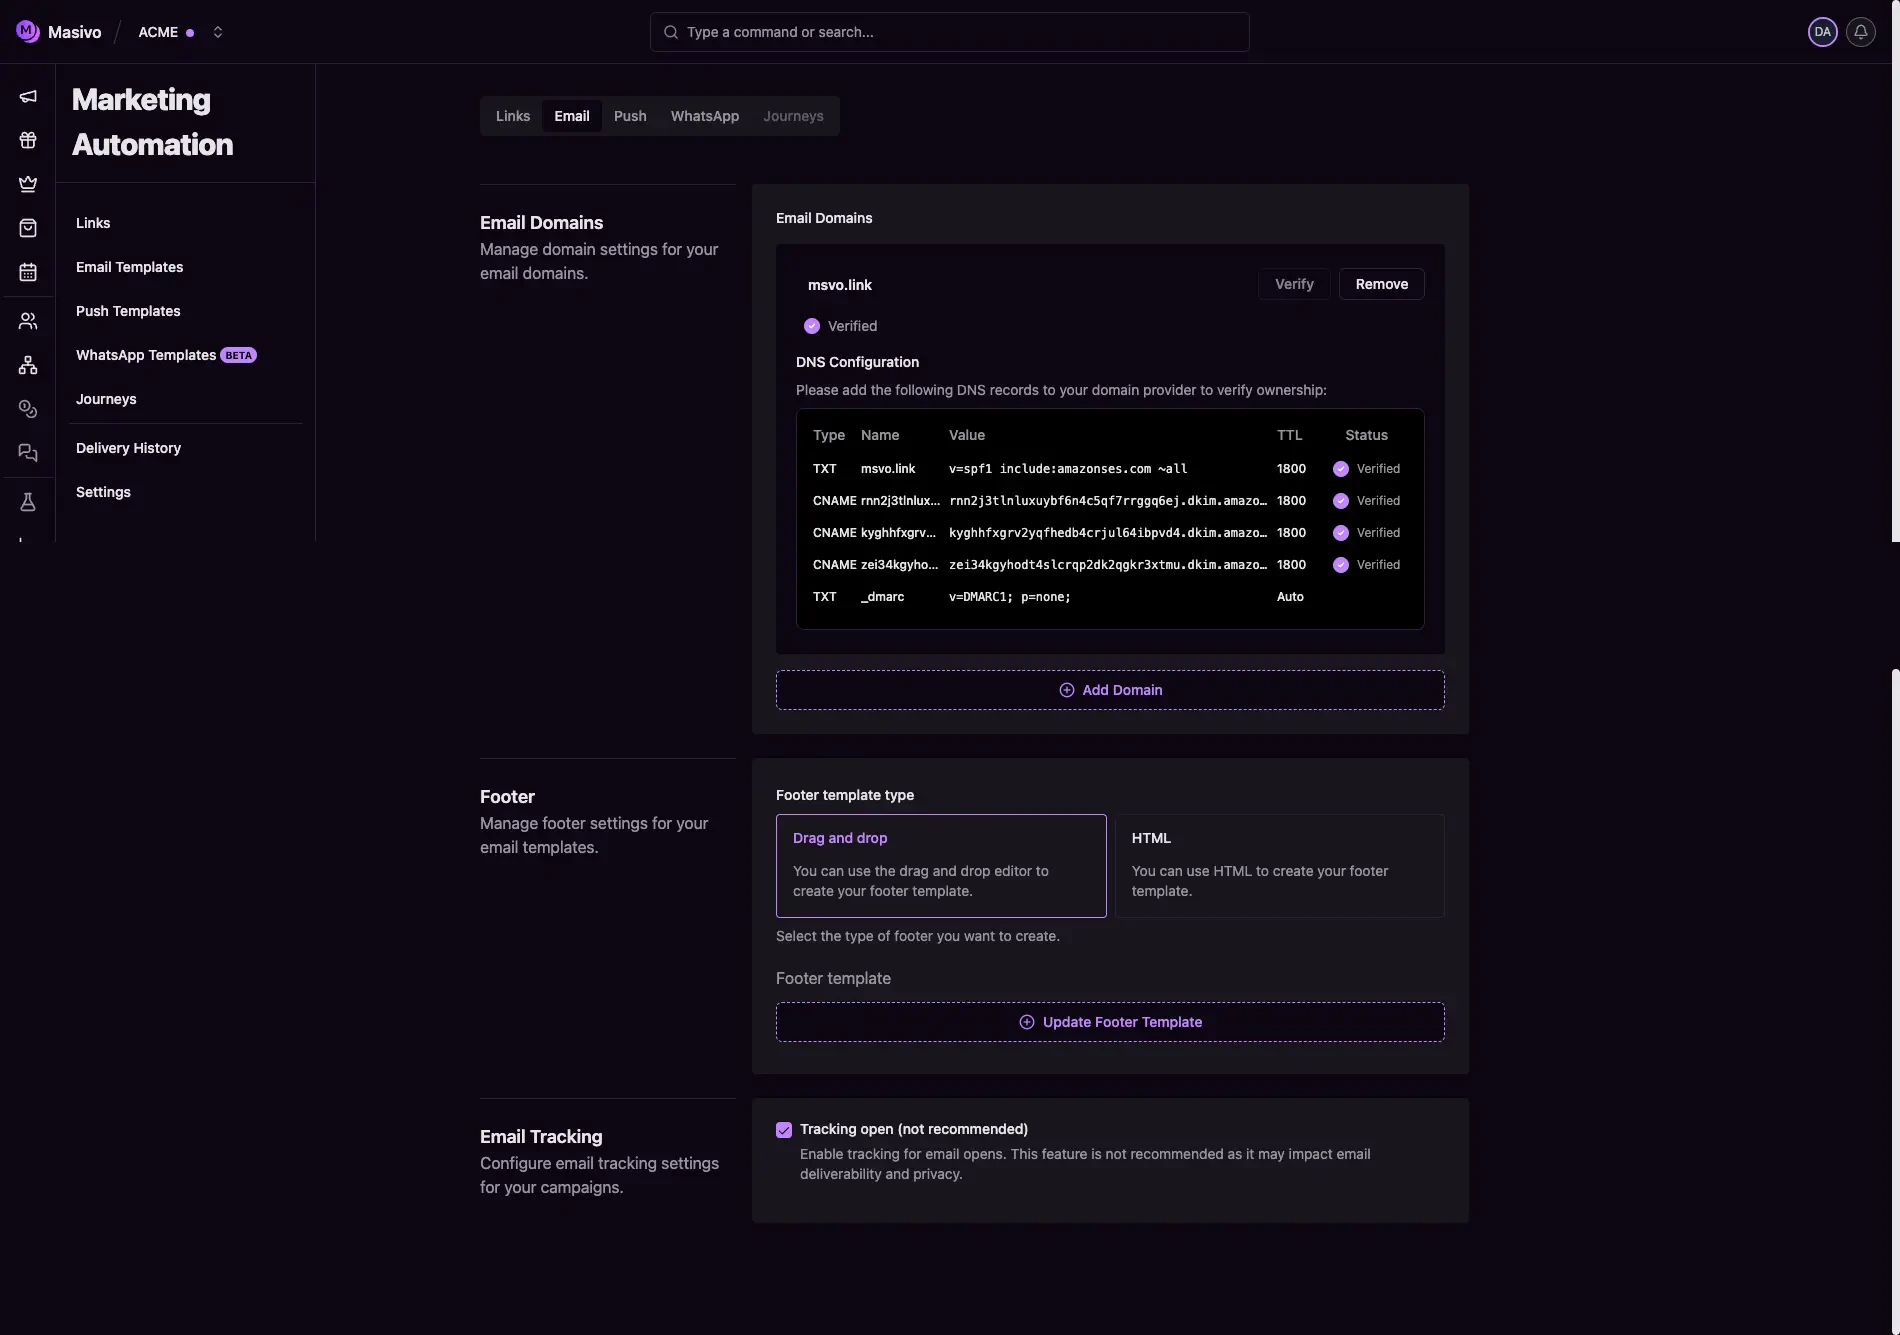
Navigate to **Marketing Automation > Settings > Email**.
This tab controls domain infrastructure and default email template behavior.
## Step 2: Configure email domains
In **Email Domains**, add and manage up to **3 domains**.
Flow summary:
* Add a domain and save the form.
* Masivo registers the domain with SES.
* Configure shown DNS records in your DNS provider.
* Use **Verify** to update domain status.
Common states:
* `not_started`
* `pending`
* `verified`
* `failed`
* `temporary_failure`
The DNS table includes required SPF and DKIM records, plus a suggested DMARC
record (`_dmarc`) to improve deliverability posture.
 ## Step 3: Connect Google Postmaster
Google Postmaster reports how Gmail evaluates each sending domain. Before
connecting it:
* Configure the same domain under **Email Domains** in Masivo.
* Use a Google account that owns or can manage the sending domain.
In Masivo's **Google Postmaster** section, click **Connect Google** and
authorize access. Masivo stores the encrypted connection in the account's email
settings and only displays Postmaster domains that exactly match configured
sending domains.
If Google reports a domain as unverified, click **Get DNS record**, add the TXT
record to the domain's DNS configuration, then click **Verify**. Masivo registers
the domain in Postmaster when needed and checks Google's verification status
from the same screen.
After connecting, open **Analytics > Emails > Deliverability** to review:
* Gmail sender compliance and deliverability verdicts
* Spam, SPF, DKIM, DMARC, and TLS rates
* Delivery errors and temporary failures
* Feedback loop IDs and spam rates
Postmaster data covers personal Gmail accounts, is not real-time, and may be
absent when a domain is below Google's traffic or privacy thresholds.
## Step 4: Configure footer template
In **Footer**, choose your default footer template type:
* **Drag and drop**
* **HTML**
Use the footer editor to create or update your footer template. The resulting
schema/HTML is saved as account-level settings for email templates.
## Step 5: Configure email tracking
In **Email Tracking**, configure **Tracking open**.
The UI marks open tracking as "not recommended" due to deliverability and
privacy tradeoffs.
## Step 6: Save and handle onboarding case
Click **Save** in form actions after updating settings.
Special case:
* If your account has verified domains but no available dedicated IPs, the
settings form is replaced by an onboarding flow to contact support and enable
sending capacity.
## What you've accomplished
You've configured the email infrastructure and defaults required for
compliant, branded, and trackable email campaigns.
## Next steps
* Build templates with [Create email template](/guides/emails/create-email)
* Review compliance setup in
[Unsubscribe links](/guides/emails/unsubscribe-links)
* Review Google's [email sender guidelines](https://support.google.com/mail/answer/81126)
## Step 3: Connect Google Postmaster
Google Postmaster reports how Gmail evaluates each sending domain. Before
connecting it:
* Configure the same domain under **Email Domains** in Masivo.
* Use a Google account that owns or can manage the sending domain.
In Masivo's **Google Postmaster** section, click **Connect Google** and
authorize access. Masivo stores the encrypted connection in the account's email
settings and only displays Postmaster domains that exactly match configured
sending domains.
If Google reports a domain as unverified, click **Get DNS record**, add the TXT
record to the domain's DNS configuration, then click **Verify**. Masivo registers
the domain in Postmaster when needed and checks Google's verification status
from the same screen.
After connecting, open **Analytics > Emails > Deliverability** to review:
* Gmail sender compliance and deliverability verdicts
* Spam, SPF, DKIM, DMARC, and TLS rates
* Delivery errors and temporary failures
* Feedback loop IDs and spam rates
Postmaster data covers personal Gmail accounts, is not real-time, and may be
absent when a domain is below Google's traffic or privacy thresholds.
## Step 4: Configure footer template
In **Footer**, choose your default footer template type:
* **Drag and drop**
* **HTML**
Use the footer editor to create or update your footer template. The resulting
schema/HTML is saved as account-level settings for email templates.
## Step 5: Configure email tracking
In **Email Tracking**, configure **Tracking open**.
The UI marks open tracking as "not recommended" due to deliverability and
privacy tradeoffs.
## Step 6: Save and handle onboarding case
Click **Save** in form actions after updating settings.
Special case:
* If your account has verified domains but no available dedicated IPs, the
settings form is replaced by an onboarding flow to contact support and enable
sending capacity.
## What you've accomplished
You've configured the email infrastructure and defaults required for
compliant, branded, and trackable email campaigns.
## Next steps
* Build templates with [Create email template](/guides/emails/create-email)
* Review compliance setup in
[Unsubscribe links](/guides/emails/unsubscribe-links)
* Review Google's [email sender guidelines](https://support.google.com/mail/answer/81126)