What you’ll learn
By the end of this guide, you’ll know how to configure Push settings required for sending notifications from Masivo.Step 1: Open push settings
Navigate to Marketing Automation > Settings > Push.Step 2: Confirm links prerequisite
Push settings require at least one custom domain configured in links settings. If no custom domain exists, push configuration fields remain unavailable and the UI prompts you to configure links first.Configure this prerequisite in Links settings.
Step 3: Upload Firebase Admin SDK
In Firebase SDK, upload your Firebase Admin SDK JSON file. Requirements:- File must be
.json. - The file is stored in marketing automation settings storage.
- Once configured, you can run test credentials.
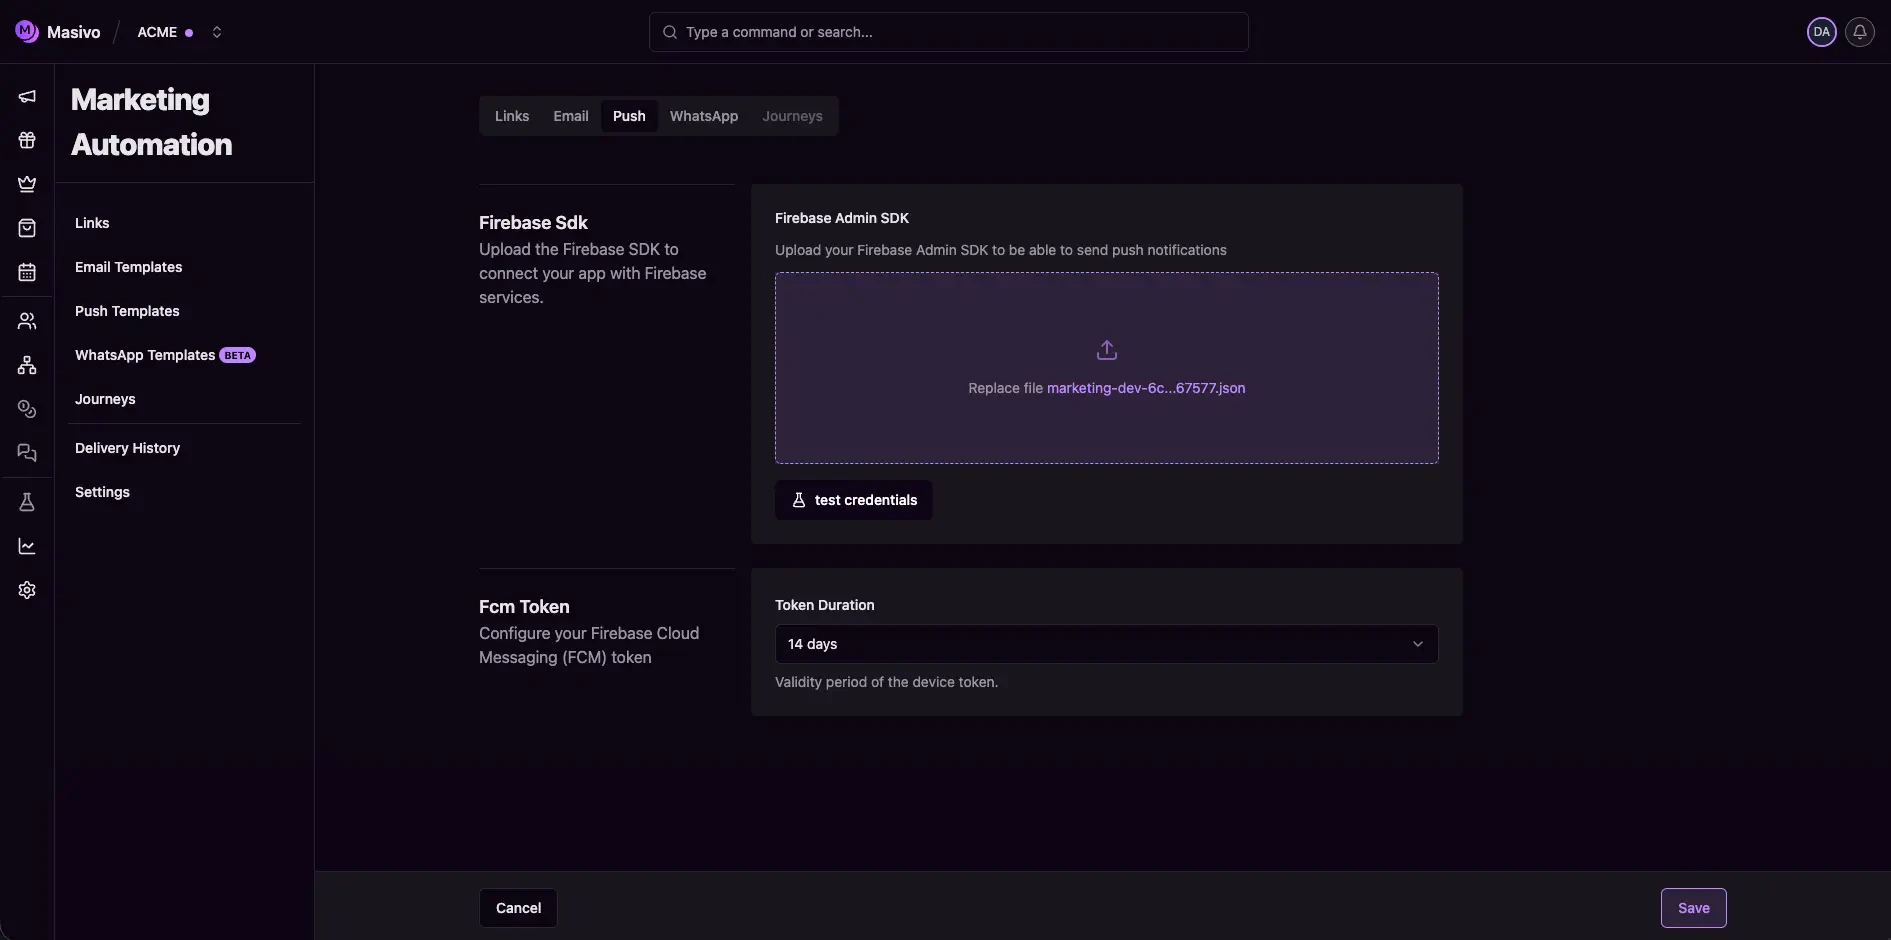
Step 4: Configure FCM token duration
In Fcm Token, set Token Duration. Available values:7days14days30days60days (recommended)270days
Step 5: Save and validate
Click Save in form actions after making changes. Then test push template sending from Marketing Automation > Push templates to confirm credentials and token policies are working.What you’ve accomplished
You’ve configured the push channel foundation, including Firebase
authentication and token lifecycle policy.
Next steps
- Create campaigns with Push guide
- Validate SDK behavior on physical devices before production sends