What you’ll learn
By the end of this guide, you’ll know how to configure email settings in Masivo, including domain verification, footer templates, and tracking controls.Step 1: Open email settings
Navigate to Marketing Automation > Settings > Email. This tab controls domain infrastructure and default email template behavior.Step 2: Configure email domains
In Email Domains, add and manage up to 3 domains. Flow summary:- Add a domain and save the form.
- Masivo registers the domain with SES.
- Configure shown DNS records in your DNS provider.
- Use Verify to update domain status.
not_startedpendingverifiedfailedtemporary_failure
The DNS table includes required SPF and DKIM records, plus a suggested DMARC
record (
_dmarc) to improve deliverability posture.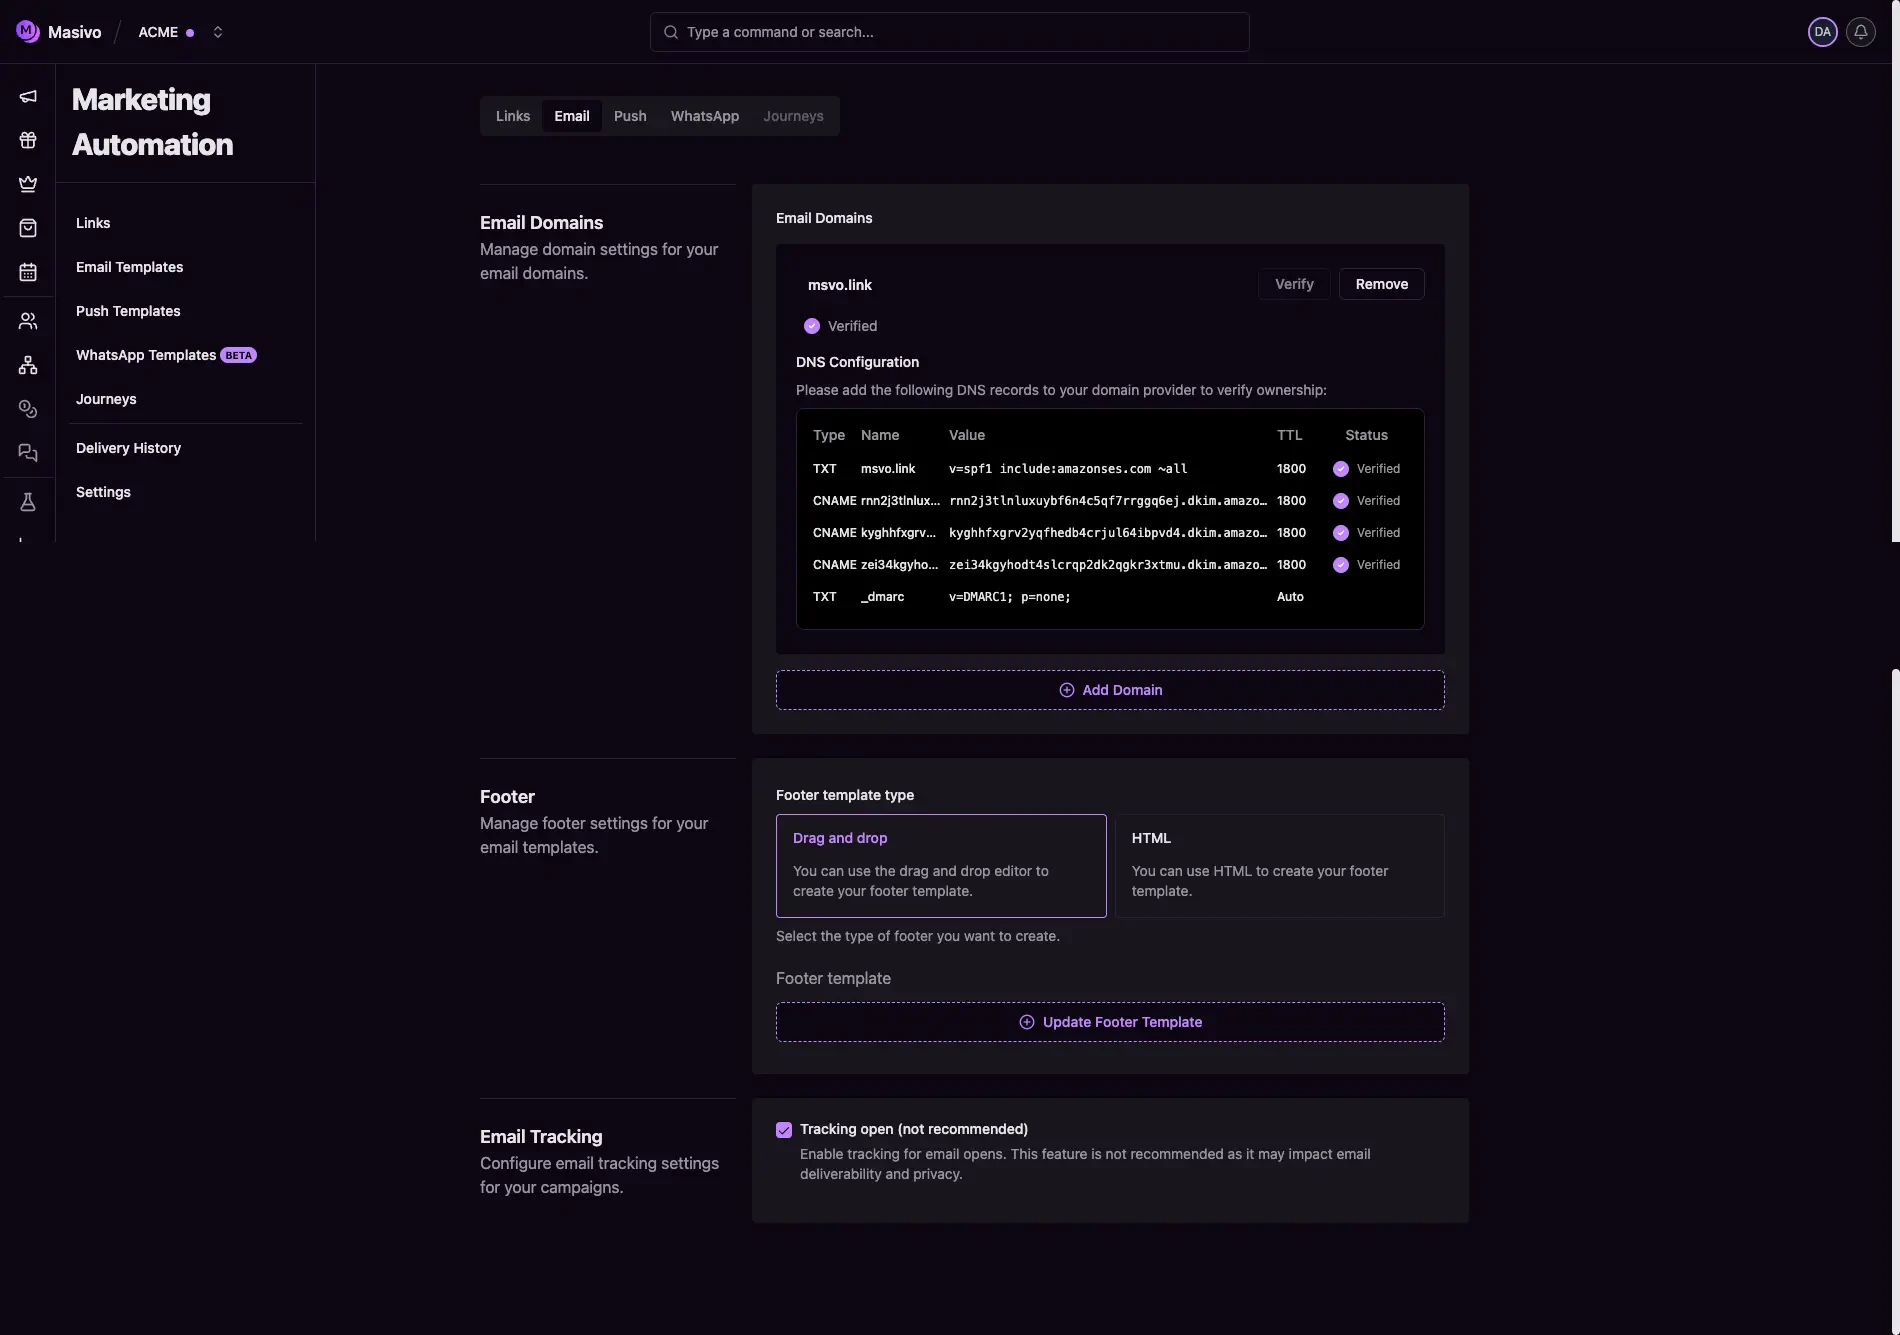
Step 3: Configure footer template
In Footer, choose your default footer template type:- Drag and drop
- HTML
Step 4: Configure email tracking
In Email Tracking, configure Tracking open.Step 5: Save and handle onboarding case
Click Save in form actions after updating settings. Special case:- If your account has verified domains but no available dedicated IPs, the settings form is replaced by an onboarding flow to contact support and enable sending capacity.
What you’ve accomplished
You’ve configured the email infrastructure and defaults required for
compliant, branded, and trackable email campaigns.
Next steps
- Build templates with Create email template
- Review compliance setup in Unsubscribe links